Introduction
The AWS Discovery Connector ships as a VMware appliance. The actual OS Amazon have used for this appliance is FreeBSD Unix. As shipped the appliance has certain features disabled. In particular you cannot use SSH via tools such as Putty to remotely connect to the appliance. That said, initial setup can be carried out using vCenter or ESX’s console access facility. Personally I find those interfaces a bit “clunky” and Putty would be my choice for longer term command line access. Also out of the box you don’t have the ability to do file transfers to or from the appliance. As the Discovery connector has an option to gather all discovery data in a file local to the appliance, not being able to transfer files is potentially an issue. In this brief article I will show how to enable both SSH remote terminal access and SCP file transfer. The re-configuration required is standard FreeBSD stuff but this recipe based approach will avoid you having to learn very much about FreeBSD, unless of course you want to. You will need some familiarity with the UNIX command line and the ability to use an editor to modify configuration files.
Enabling SSH remote terminal access
Connect to the appliance via vCentre or ESX console
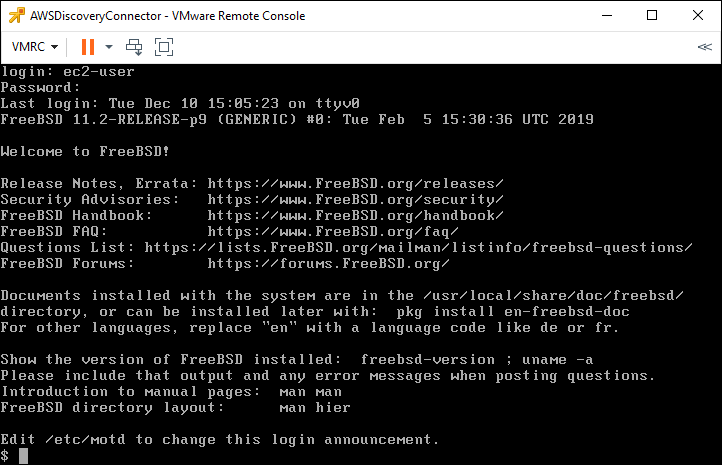
The first step is to connect to the console of the appliance using either the vCentre or ESX console facilities. Log in using “ec2-user” and a password of “ec2pass” as shown below
Become the root user
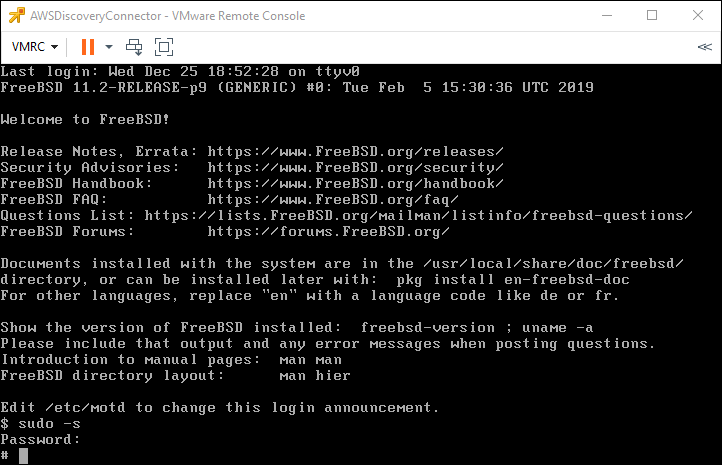
The user “ec2-user” is not a privileged user and to do some of the reconfiguration required we need root access. Luckily this is simple enough. We use the command “sudo -s” to become the root user as shown below. The password you enter is “ec2pass”. Once you are the root user the command line prompt will change to “#”
Change the /etc/rc.conf file to enable sshd
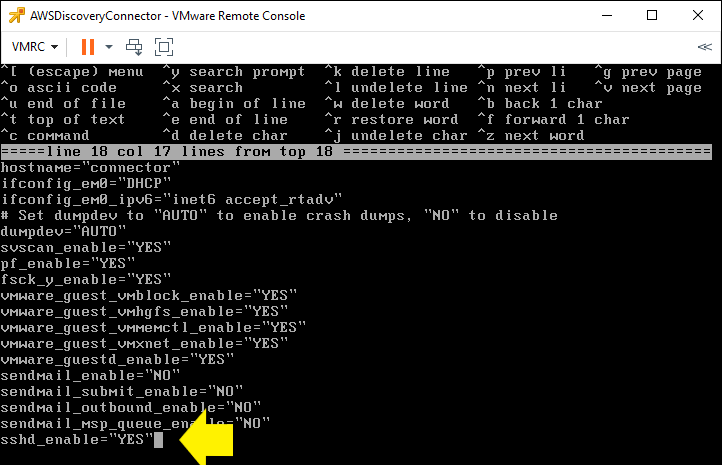
The next step is to edit the file /etc/rc.conf and add a line to enable the ssh daemon (sshd). As a long time UNIX user I normally use the vi editor. If you are not an experienced UNIX user the easiest editor to use on FreeBSD is probably “ee”
When you are in the editor move the cursor beyond the last line of the file using arrow keys and type sshd_enable=”YES” Then hit escape and select “a” from the menu to exit and then “a” again to save the changes
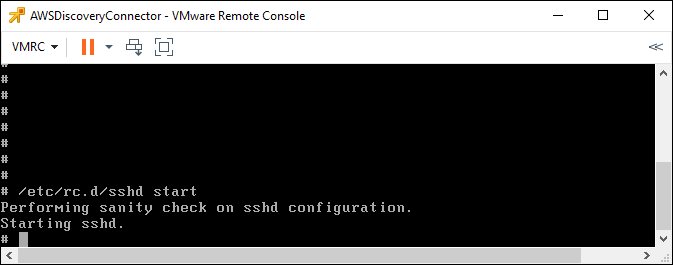
Once you have updated the /etc/rc.conf file you can start the sshd daemon as shown in the example below by issuing the command “/etc/rc.d/sshd start”
Adding a local firewall rule to allow SSH access
Like many operating systems FreeBSD has a built-in firewall (in fact it has 2, one called PF and the other called IPFW) The AWS appliance makes use of PF. To allow us to SSH to the appliance we have to add a rule to pass SSH traffic. This is done by editing the file /etc/pf.conf. I will show this using the basic “ee” editor. So to edit the file type the command “ee /etc/pf.conf
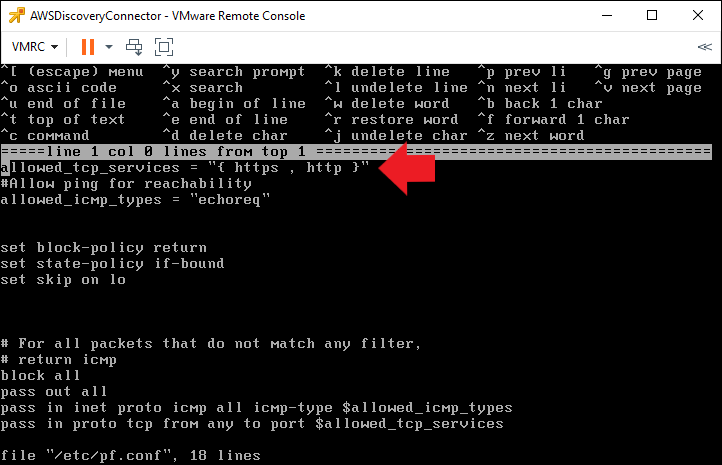
We change the line that starts “allowed_tcp_services” and add an entry for ssh in the list in curly brackets as shown below
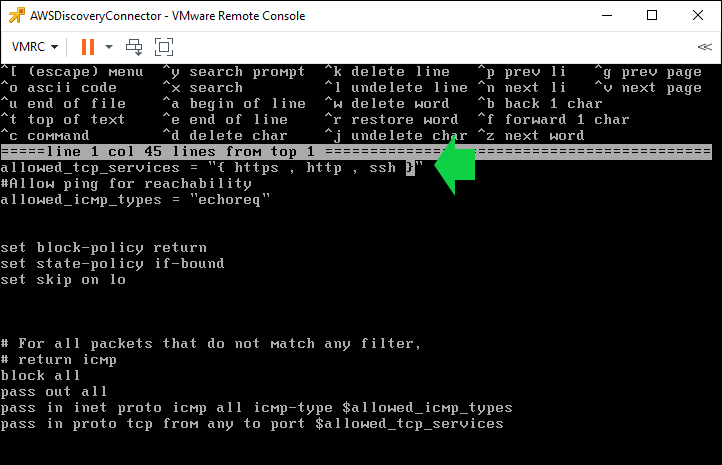
Then hit the Esc key and “a” (first menu choice) and then “a” again to exit and save the changes.
Restart the pf firewall
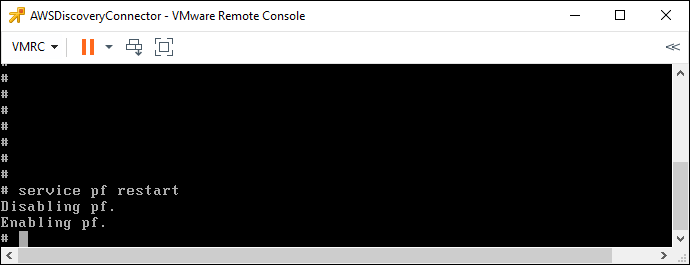
Lastly we need to restart the pf firewall so that it reads the rule change that we have just made. To do this issue the command “service pf restart” as shown below.
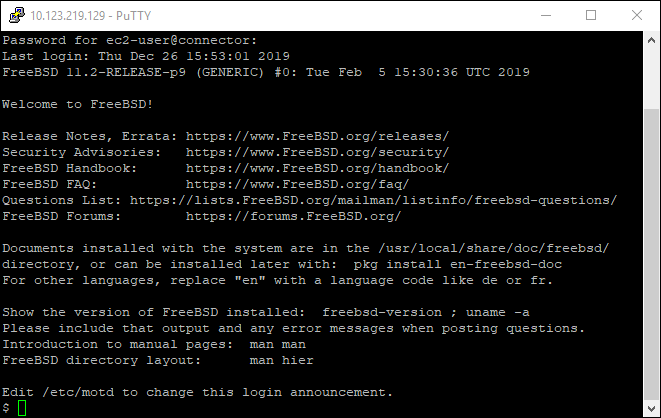
Log in via SSH
You should now be able to login to the appliance via an SSH client. An example using Putty is shown below
Conclusion
Whilst, strictly speaking, it is not necessary to be able to SSH and SCP to the Discovery connector I find it occasionally useful and hopefully this article will help those of you with the same opinion