Introduction
Back in 2016 Amazon made available the AWS Application discovery service. This free to use tool is part of a service intended to help organisations plan and manage migrations into AWS. The AWS Application discovery service uses either an Appliance run as a VM or agent software installed on individual servers (virtual or physical). The Appliance is a VMware only offering that connects to vCentre. From both the individual server agent and the Appliance data is uploaded into a repository that is part of the AWS migration Hub. One interesting aspect of these tools is that you could use them as the basis of discovery even if you are not migrating into AWS (the cost of doing this is very modest)
Set-up
Create an Administrator group in IAM
There are a number of policies (permissions) provided by AWS to give fine grained control over discovery. However, to get up and running quickly you can grant a user admin privileges which provide all that is needed from the get go. That is what I will show in this article. Firstly lets create a Administrator group
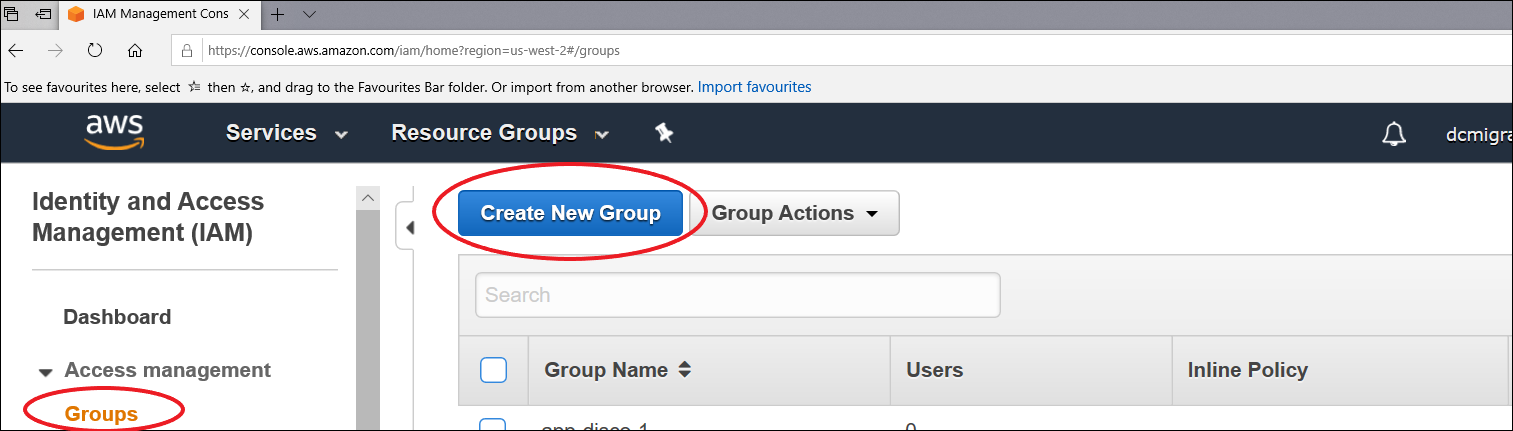
Go to the IAM service on the AWS console and select Groups in the left hand side bar.
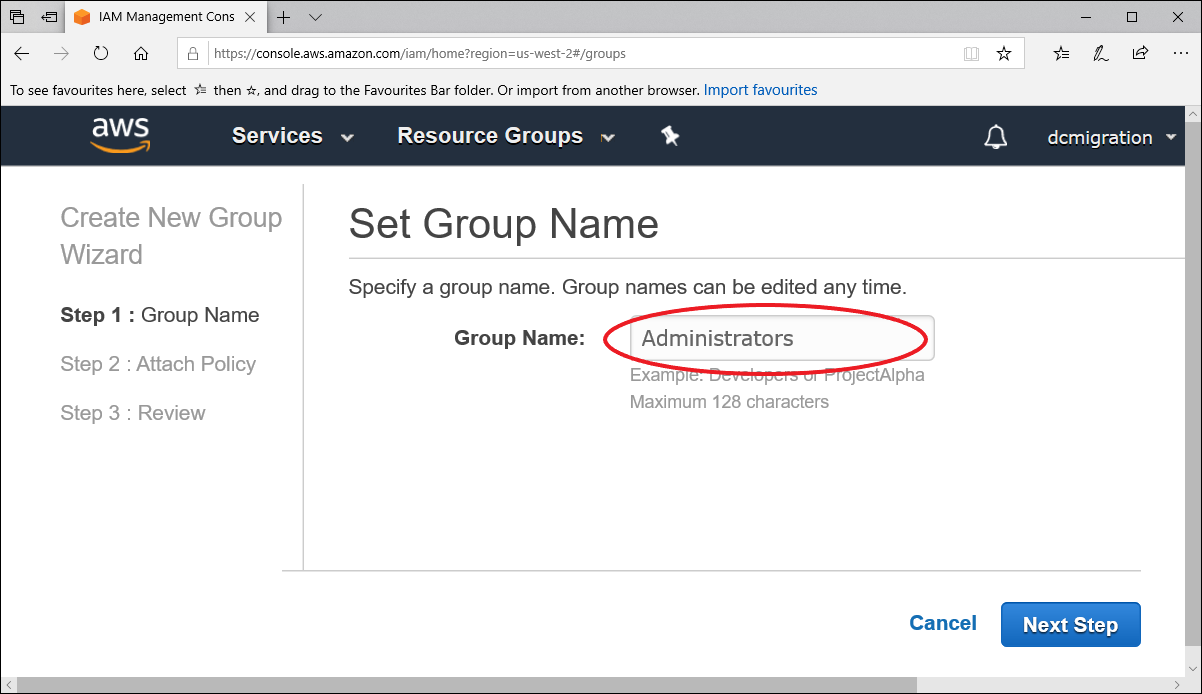
Next give the group a name (here I use “Administrators”) . Then click “Next Step”
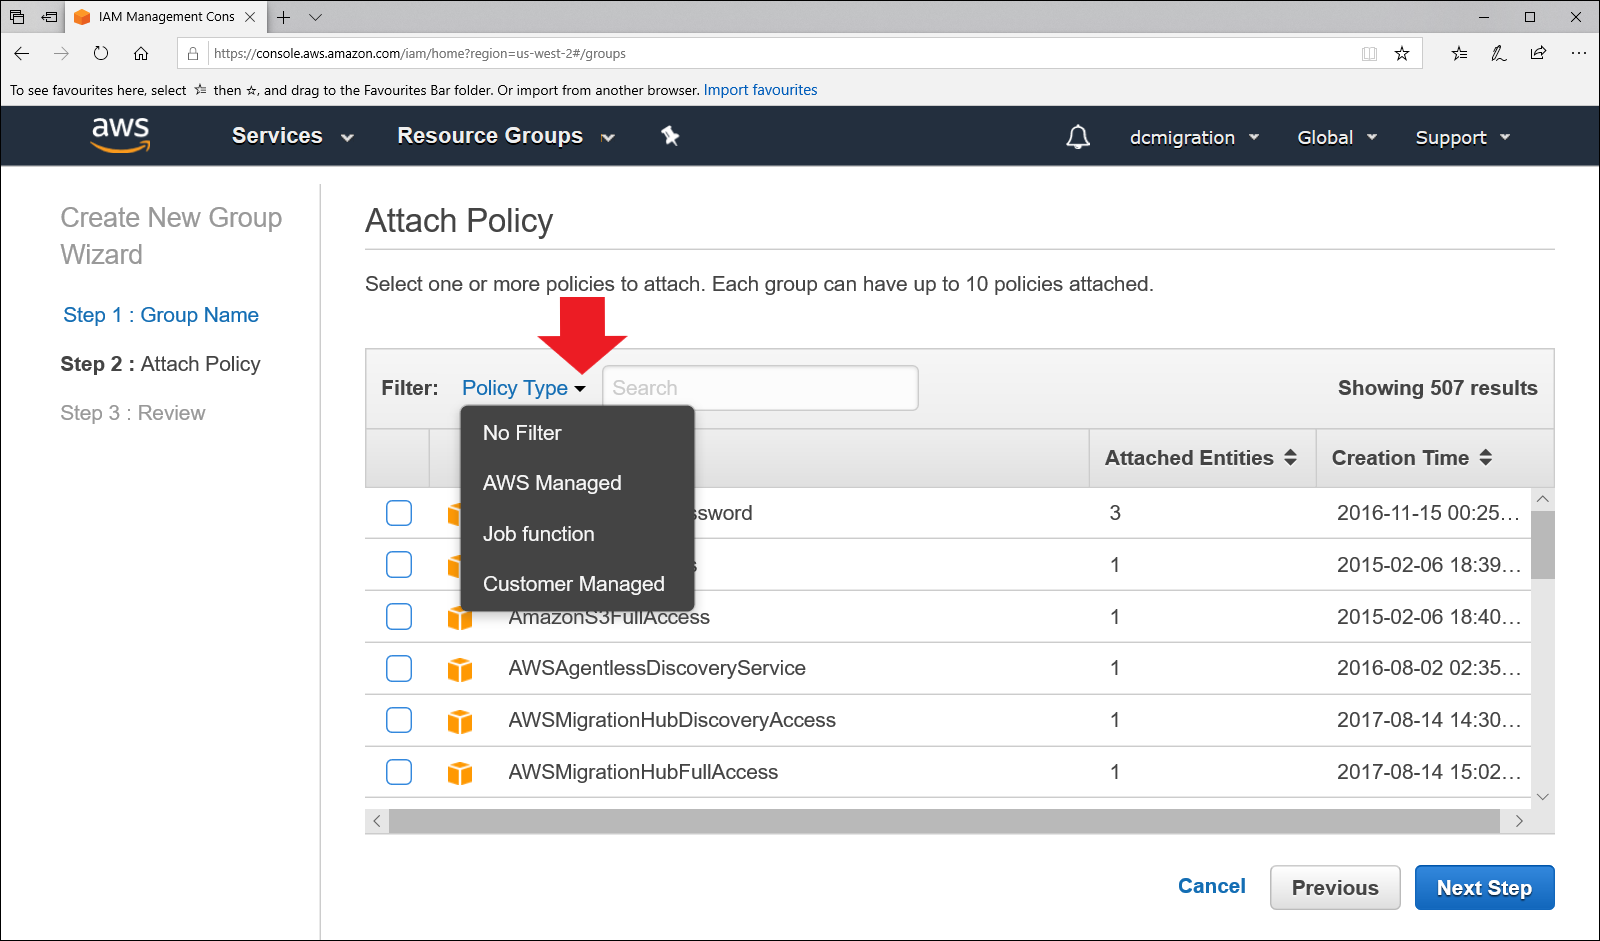
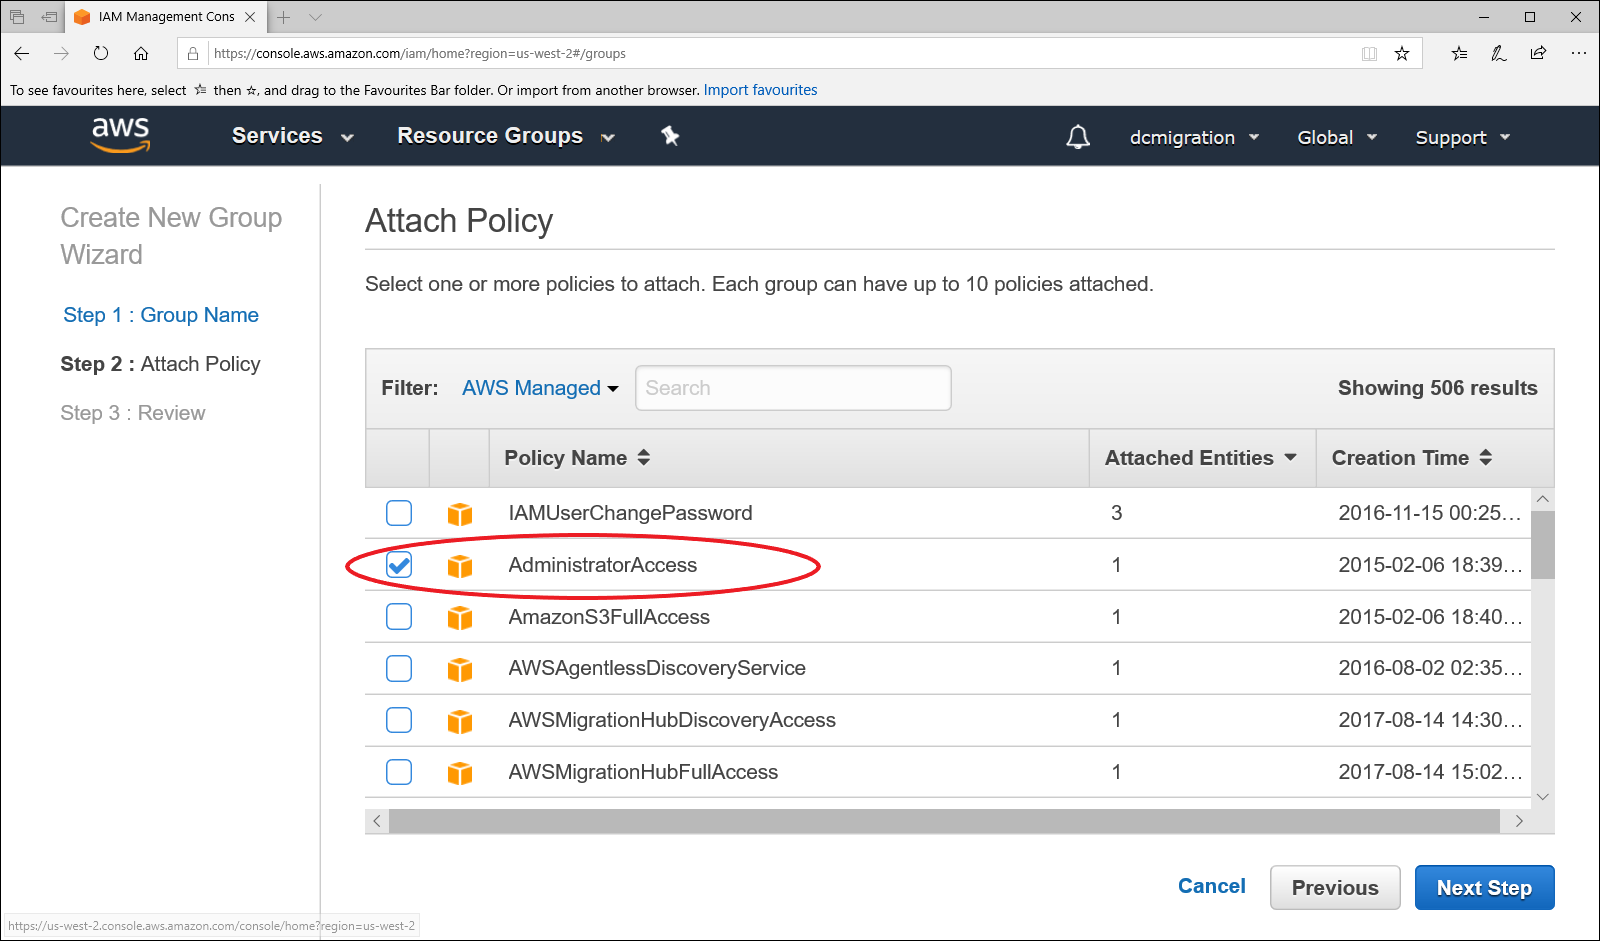
Next we assign Policies to the group. To display the policy we need click on the drop-down arrow next to “Filter: Policy Type” and select “AWS Managed”
In the list of “AWS Managed” policies select “AdministratorAccess” and click “Next step” as shown below.
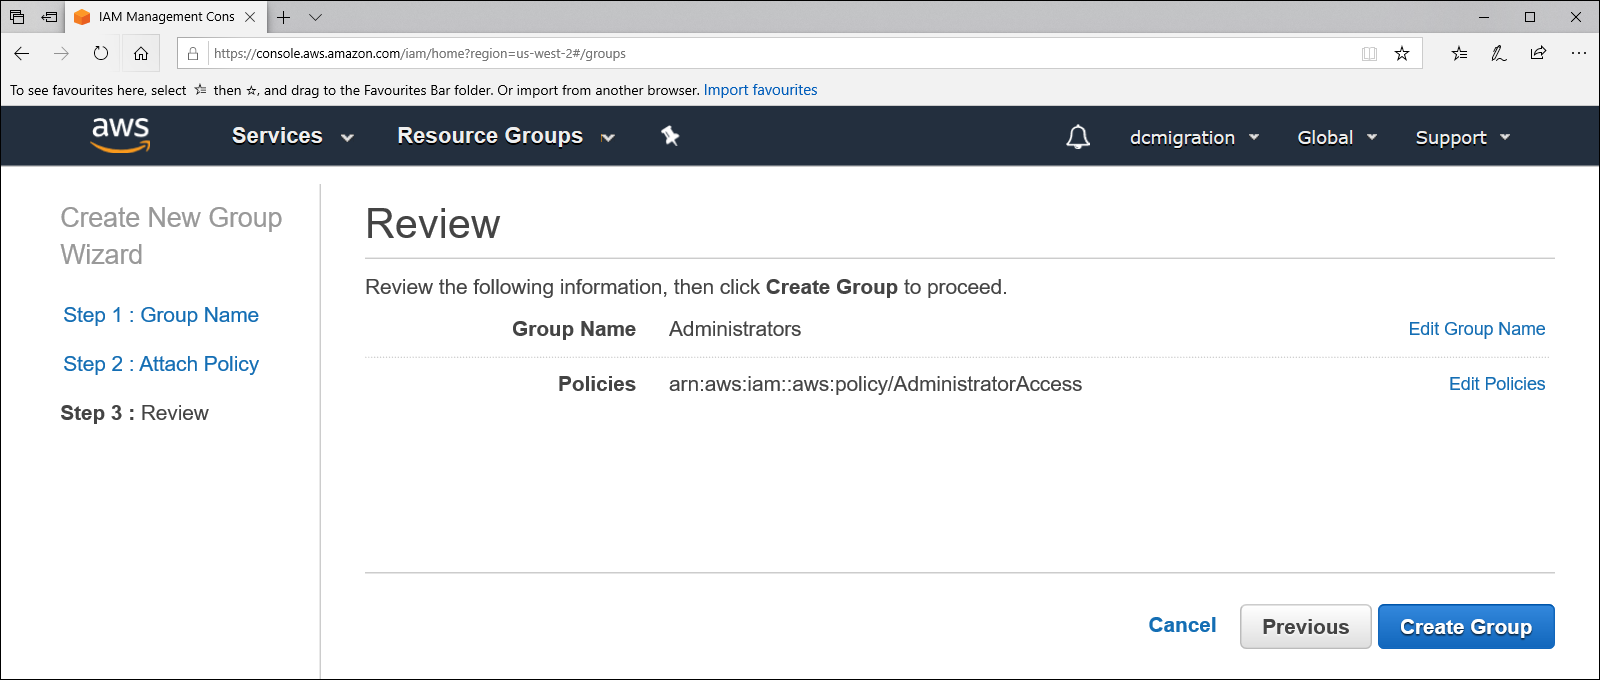
Finally on the “Review” page click “Create Group” as shown below.
Create a discovery user in IAM
The next step is to create a discovery user in IAM.
Download and install the connector appliance
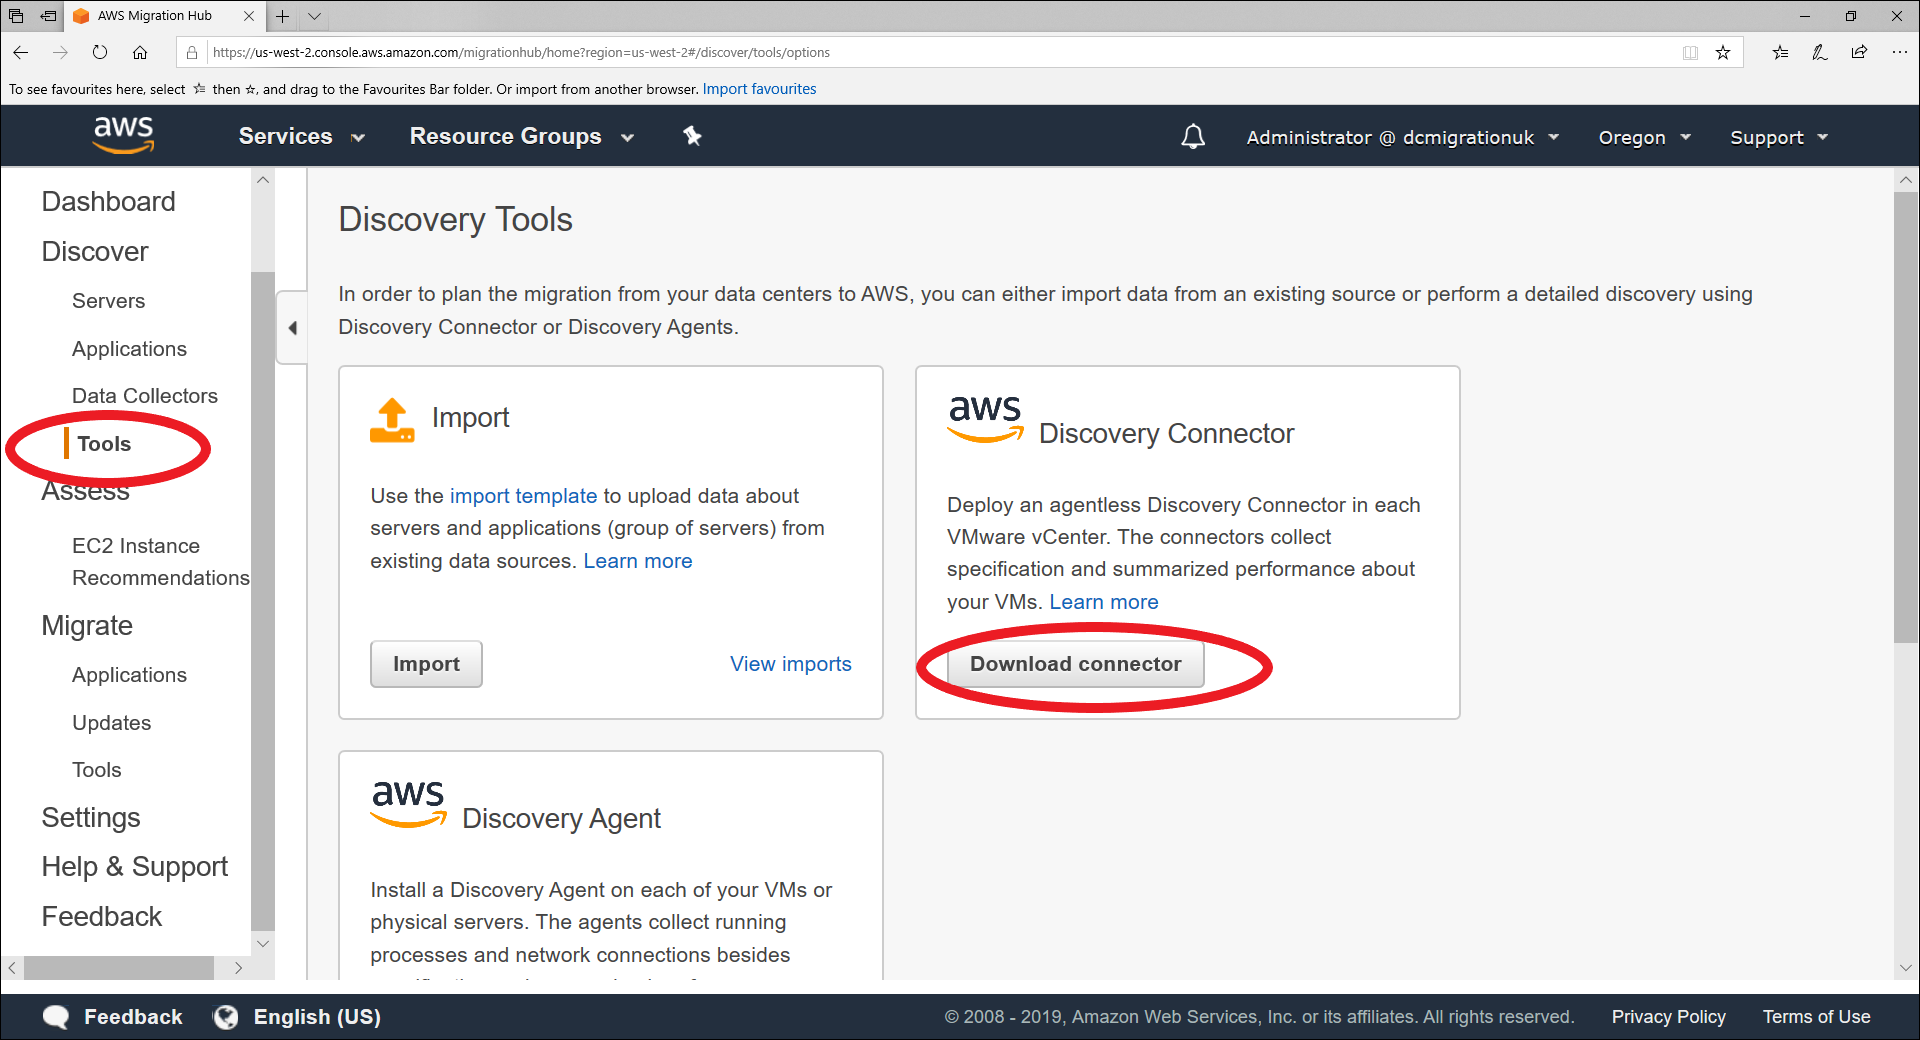
The AWS Discovery connector is available in the Discover->Tools section of the AWS Migration hub.
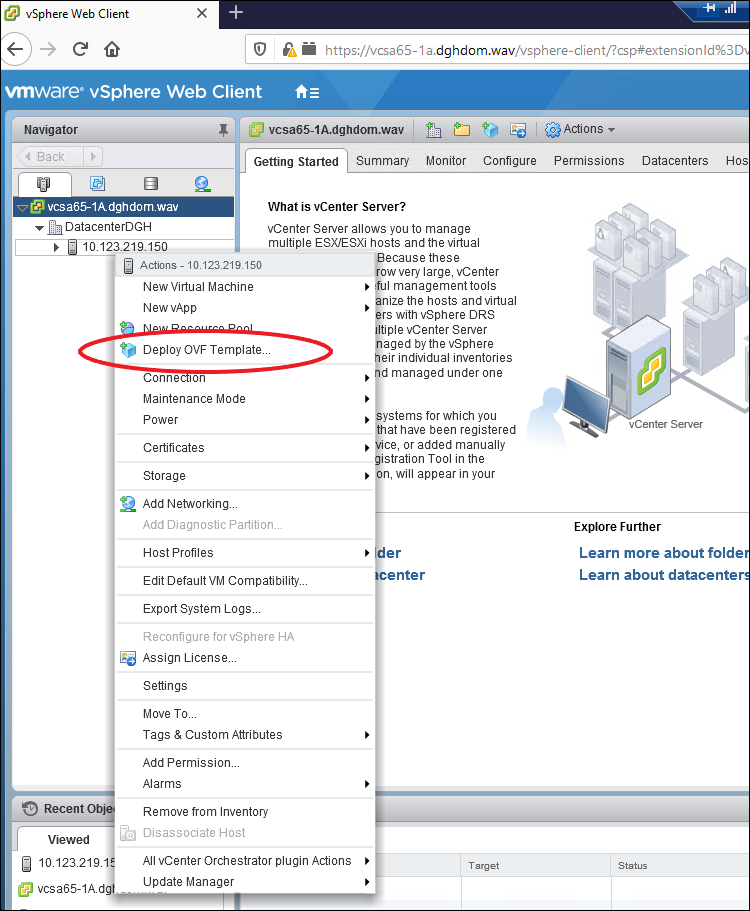
Download the OVA file and then import it into your VMware environment. There are various ways you can do this. The simplest is to use vCentre as shown below. Before you power the appliance on you may want to read the next section
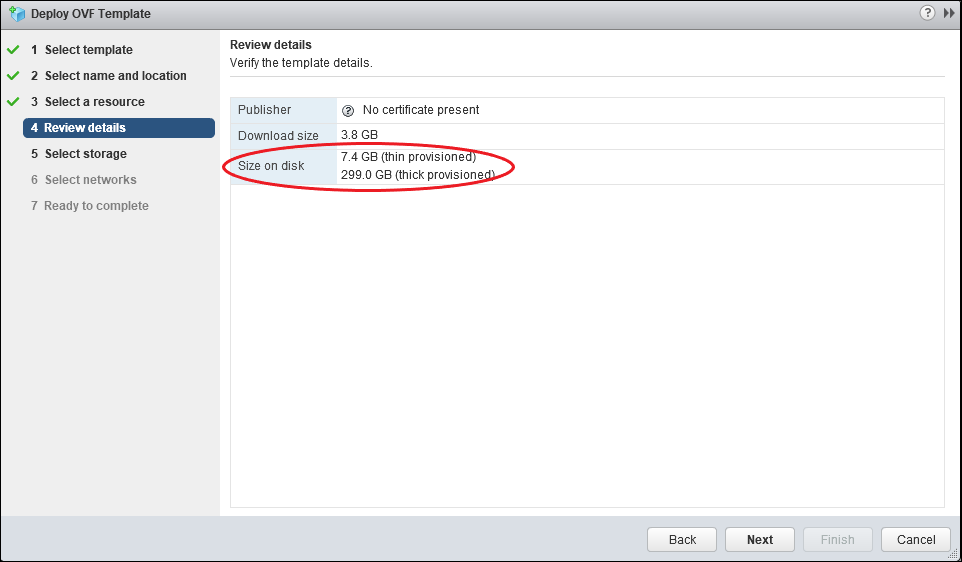
I won’t detail all the steps of the OVA deployment as it is fairly straightforward. However, there are a couple of things to mention. Firstly Amazon strongly recommend that you use thick provisioned disk storage for performance reasons. I guess that could be an issue for the discovery of very large estates. The default for the appliance is nearly 300GB. I didn’t want to waste that much space in our lab environment so I choose thin provisioning instead.
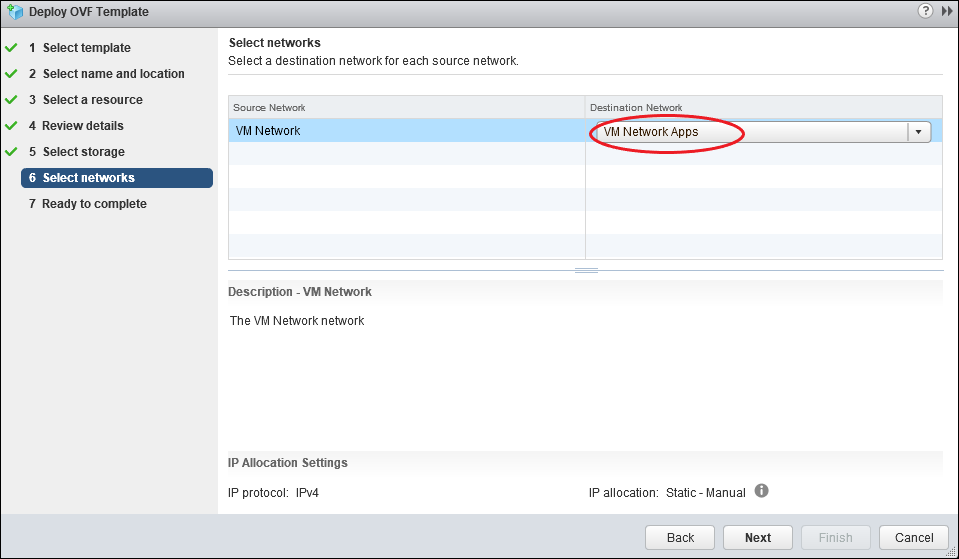
Secondly just an explanation of step 6 below for folks who have not deployed an OVA before. What this screen says is that the appliance was built with its NIC connected to a network called “VM Network”. On right hand side you need to decide which of your local VMware networks you want to connect the appliance’s NIC to in your environment.
Configure the connector appliance – Part 1
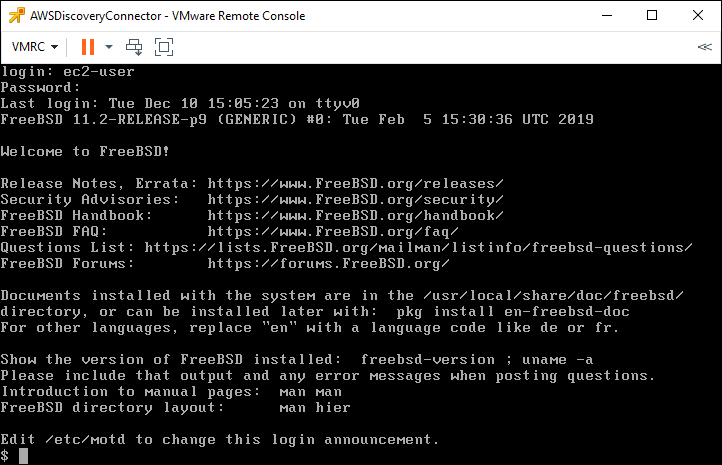
Out of the box the Connector appliance is configured to use DHCP. In most environments you will probably want it to have a static IP address. I think the simplest way to achieve this is to create a DHCP reservation on your DHCP server (in my lab I use Active Directory) . If you don’t want to (or can’t) go the DHCP reservation route configuring the connector is a bit clunky. If you want to give the Connector a static IP address directly you need to break out from the Web Interface and log on to the appliance via its VM console and run a CLI based configuration script there as shown below. First log in via the VM’s console (either ESX or vSphere). The user name is “ec2-user” and password is “ec2pass”. Note that out of the box you can’t ssh into the appliance (but see my article on fixing that here )
Having logged in you need to run the script “setup.rb” via the sudo utility as shown below (sudo allows normal users to run privileged commands provided they have been granted access, which ec2-user has been)
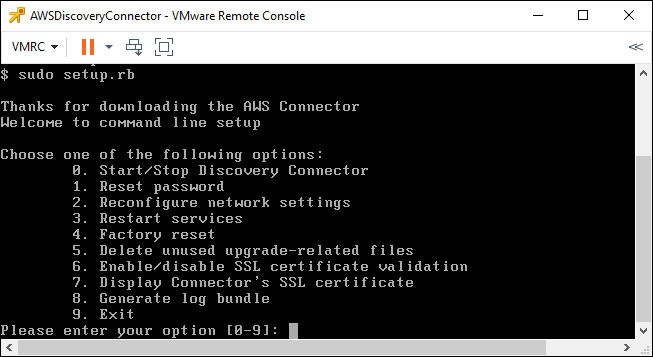
Next we choose menu option 2 “Reconfigure network settings” Simply specify the network information you have decided upon

Here are the changes I have made to the appliance network settings.

A note of caution. The setup.rb script does very little in the way of error checking. The first time I used it I was careless and mangled the IP address such that it was not on the same subnet as the default gateway. The script tried to execute that and crashed out with an error as shown below. So double check your info.
Configuring Discovery from the Web interface
Introduction
Once you have configured your appliances IP information to your satisfaction you can configure it to connect to the AWS migration hub. Note that most things are actually controlled from the AWS migration hub and no the appliance. The appliance polls the hub at regular intervals to see if there are any new instructions.
Appliance configuration steps
Point your web browser at the appliance IP address as shown below. We have not talked about registering the appliance’s certificate so you will get a certificate error first time out. You can safely choose to ignore this. Click on the “Get started now” button.

You will then be asked to accept a licence agreement as shown below.

The next step is to create a new password for the appliance as shown below.

The next page prompts you to run setup.rb if you want to change to a static IP address. We have already covered this earlier in this article so you can simply skip this page by clicking “Next”. As an aside it is a bit disappointing that Amazon did not build the ability to reset the IP into this Web interface.

The next step is to configure log uploads and automatic updating of the appliance. The choices are fairly self explanatory and are shown below.

Lastly we come to configuring the Appliance’s connections to both AWS and your local vCentre. Note: this configuration is in 3 parts. For some reason Amazon have formatted this as a single long web page rather than 3 separate pages. I don’t quite agree with the style but it is what it is. In the first section you supply the credentials for your target vCentre. Do not click “Next” , rather scroll down the page when you have completed this section.

The next section on the page allows you to supply the AWS credentials for your “Discovery” user which we created earlier in the article. Note that this is not the “human” logon info. Rather it is the AWS CLI “Access Key” and “Secret Key” that were generated when you created the user. If you forgot to note them down you can’t get them back. However, all is not lost. The way out of that is to go back into IAM and create another key pair. Again don’t click “Next” Rather scroll down to the last section of the page.

the last section is to configure the AWS Hub location. For now do not tick the “Publish Data to File” box. Now you can click “Next”

Conclusions
If you have successfully got to this point you are ready to begin discovery activities. You should note that discovery is initiated from the AWS migration hub and not from the appliance on your site. I will be explaining more about this in part-2 of this series of articles.