
Overview
The AWS VM Import/Export service allows you to move VMs from other virtualisation platforms, such as VMware and Hyper-V, into the AWS environment and have them re-created as AMIs in the EC2 service. It provides a relatively straight forward way of getting an existing VM up and running in AWS. In my opinion it is not particularly suitable for bulk VM migrations as the process is not particularly slick. For bulk migrations other tools, such as Amazon’s SMS, are available. However, when you are first starting out with AWS this process will get you some of your existing VMs up and running in the AWS cloud fairly quickly. In Part 1 we mainly go into the set up required on AWS. Part-2 looks at importing a VMware VM and Part-3 looks a doing the same with a Hyper-V VM.
Use Cases
From a migration standpoint probably the most common use case for migrating servers into AWS using these tools is the migration of test and development servers. I say that because the technique takes a view of a server at a point in time and the server should not be in active use. Often that is not so easy to do with production servers. As you will see from this article the initial process is somewhat long winded. Having said that quite a few of the steps only need to be done once. There are a number of different ways of achieving the same goal. In my example here, I make use of the AWS CLI. Doing this gives some scope for scripting some of the process. Notwithstanding all that if you are going to migrate a reasonable number of VMs into AWS you should check out Amazon’s Server Migration Service (SMS). SMS provides a much greater degree of automation and it is a (semi) on-line migration method. You can read my article about SMS here.
How does it work?
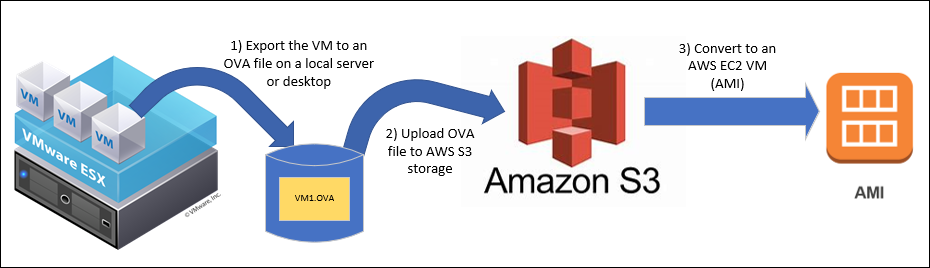
You create an export of your source VM as an OVA, VHD etc. You then upload the server image to one or more Amazon S3 storage objects. Note AWS has a variety of different storage technologies. S3 (Simple Storage Service) is an object-based (file) storage repository. This is distinct from the Block level storage (EBS) that you will typically use as virtual disk images for your AWS virtual machines. It is not my intention to provide an S3 tutorial within this article, there is a lot of information about S3 available from AWS and other sources . However, one thing to note is that S3 objects are addressable via a Web URL (subject to you setting the appropriate permissions) You could even host a serverless Website with static pages on S3. Once you have you VM export file sitting on S3 you can then use the AWS VM Import/Export service to migrate it to an EC2 instance. The process flow is shown below (the diagram shows an ESX host on the left but that could also be Hyper-V)
Setting up
As I said the initial process is quite long-winded. Here is a road-map of the steps. Some steps do not have to be done in the order I specify but you might as well stick to the ordering given here.
- Create a migration user in the AWS IAM console. You can use an existing user but I think it is neater to create a specific user for the import tasks
- Install the AWS CLI software on the system you will use to manage the migration (I am using a Windows 10 desktop)
- Create an S3 bucket to hold the source VM export (Again you can use an existing S3 bucket if you have one but it is cleaner to create one specifically for Import/Export use)
- Grant the migration user permissions for the S3 bucket and EC2 (including Import/Export) service
- Create your export file in the source environment
- Upload the source VM export to your S3 Bucket
- Create configuration JSON file as input to the Import service
- Tell the Import service to import the VM image
- Wait while it does it !
- Launch the AMI created as a result of the import
- Carry out any required VM reconfiguration
Create a Migration service user
You can, of course, use an existing AWS user but I think it is cleaner to create a user specifically for migration activities. Users are created using the AWS IAM console (Identity and Access Management) This article is not the place for an IAM tutorial. Some basic information can be found here
The migration user I have created for this post is “migrationmgmt“
Also note that when you create the user you need to save the Access Key and Secret Access key that are generated when you create a user as you will need them for AWS CLI configuration. These Keys are only used for API access and not for human logon to AWS. When you create the user you get the option to download the keys as a csv file for later reference. You should do this as the keys are only viewable at “create” time, you can’t go back and get them later.
Install the AWS CLI on the system that will manage the migration
Amazon provide a Command line utility known as AWS CLI for most operating systems. The CLI is a command line interface that allows you to perform a vast number of AWS actions from the command line. The CLI is installed on the system you will use to manage the migration, not the VM that is being migrated. We will use it to carry out many of the key steps in migrating a VM into AWS. The AWS CLI is written in Python so you will need to have Python installed on your chosen platform as well. Be aware that technically there is not simple “latest and greatest” version of Python. Rather the Python world is split into two with many developers still using Python version 2. There is a version 3 of Python which is not entirely backwards compatible with version 2. Many Linux distributions still ship with Python 2.7.x as the default version of Python. Either major version of Python is supported but check the AWS CLI documentation to see what specific version you need. Also note AWS CLI is available for Windows and Amazon provide MSI installable packages (You don’t need to install Python on Windows as the AWS CLI package comes bundled with a private copy of Python 3.6.x). The AWS install documentation for AWS CLI can be found here https://docs.aws.amazon.com/cli/latest/userguide/cli-chap-install.html
AWS CLI install verification
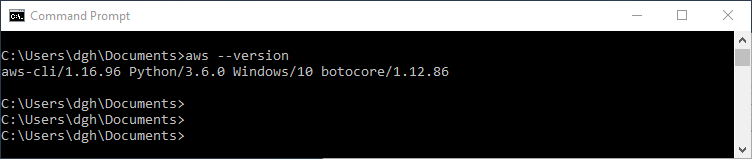
For the purposes of this article I have installed the AWS CLI on a Windows 10 desktop using the AWS provided MSI installer. This installer, as you would expect, does everything for you so you don’t need to worry about Python installation and editing your PATH variable. Once the install is complete you can verify it by issuing the simple command shown below to list the AWS CLI version
AWS CLI configuration
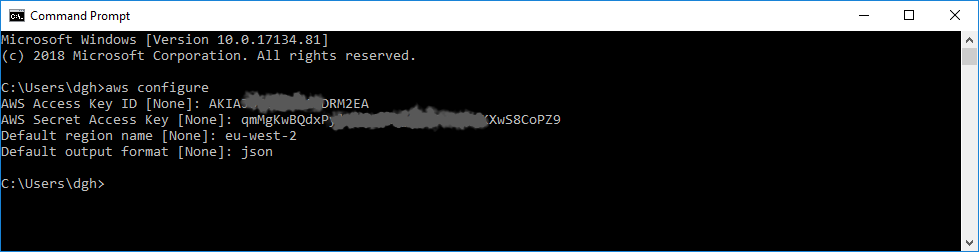
The CLI communicates with AWS to get its job done. Consequently it needs to know user credentials and what AWS region to connect to. You can set this information up using the “aws configure” command as shown below. You will need the Access key and Secret Access key for the user you previously created. Don’t worry if you forgot to save them, you can’t get them back but you can generate new ones using IAM (Oh and by the way don’t bother trying to use the credentials in my example below, I have already changed them)
Testing the AWS CLI
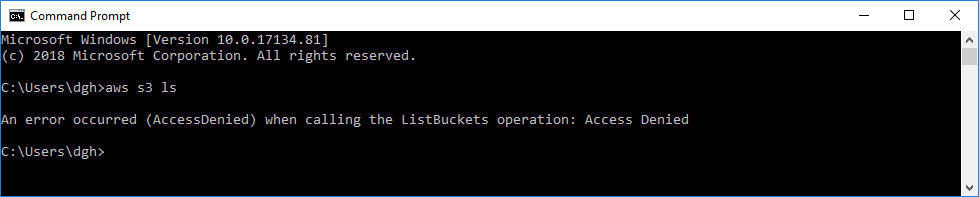
You probably have not set up any permissions for your migration user at this point so testing that the CLI can talk to AWS is somewhat restricted at this stage. However, we can use a simple CLI command to list your S3 Buckets. It won’t work and it should tell you that you don’t have permission. In doing this it does talk to AWS so it is a basic connectivity test.
Creating an S3 Bucket
As previously mentioned you will need to store your exported VM image on S3 storage. Many AWS migration tools make use of the AWS Simple Storage Service (S3). S3 is object (file) based storage rather than block level storage such as you would use with an AWS virtual server. If you are new to AWS the terminology may be a bit confusing but if you just think of S3 as a giant file share you won’t go far wrong. The reason many migration tools use S3 is that it is Internet accessible and it is therefore relatively easy to upload server image files for later import to EC2. S3 is organised by “Buckets” (think of a Bucket as a top-level folder) Note that S3 bucket names reside in a globally unique name space. As a consequence, any bucket name you create must also be globally unique, the reason for this is that the bucket name will form part of a URL that will allow the bucket to accessed from the World Wide Web. You will find as a consequence that many “obvious” Bucket names are already taken. Once you create a Bucket you will need to set appropriate permissions to upload VM image files. Currently the largest file size that can be uploaded to S3 is 78GB.
The bucket name I have used for this post is “servermigrationtest“
In my example I have used the S3 “Standard” storage tier. It should be noted that there is some scope for cost reduction by using one of the other, slightly cheaper, S3 tiers for your migration activity. I say that because the Buckets you use for migration will not be constantly accessed nor will they need to be available in multiple zones. The other tiers are
- S3 – IA (Infrequently accessed)
- S3 One Zone -IA
Granting the migration user permissions & creating a vmimport role
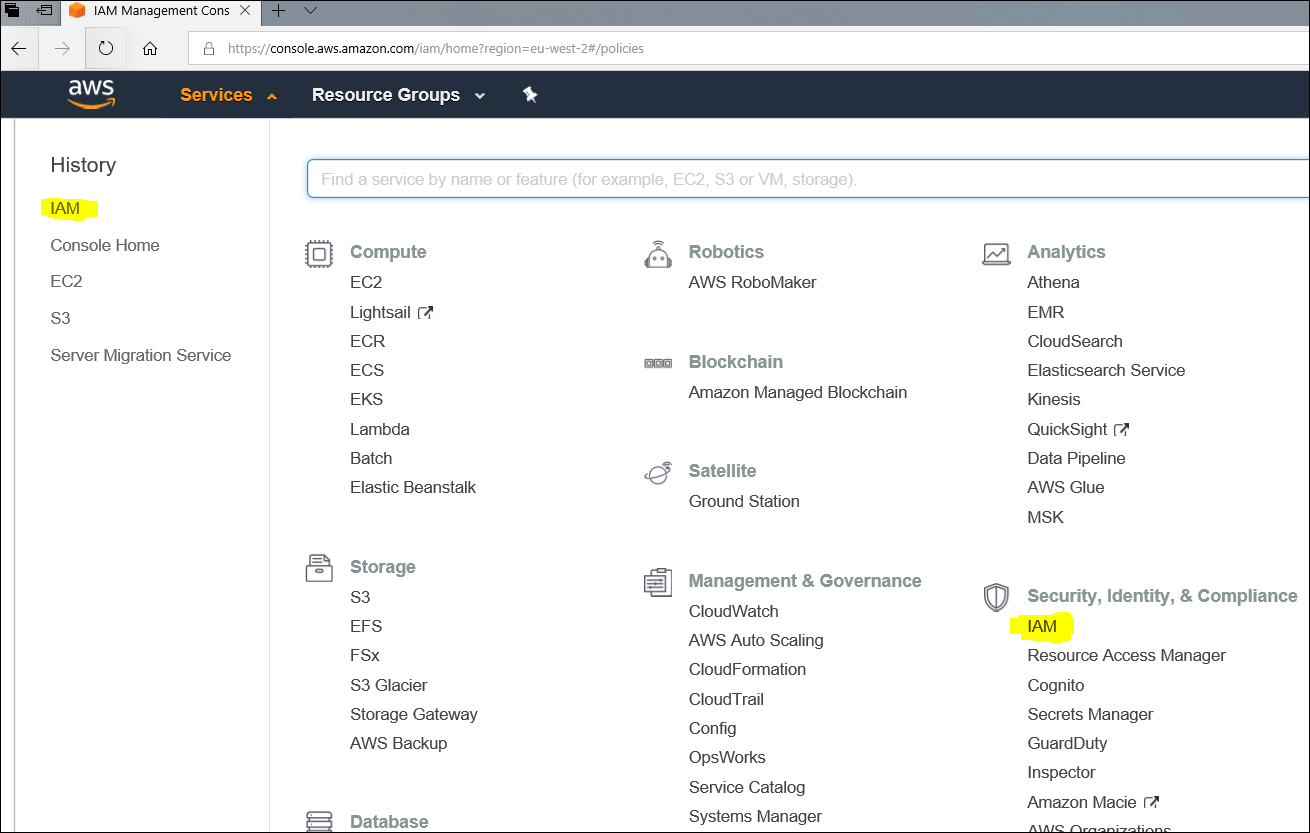
As previously mentioned our newly created migration user does not have any permissions set. To allow this user to upload the source VM export to S3 (and perform some other AWS set up tasks with CLI) the user will need to be granted various permissions. These include write permission to our migration Bucket. The user will also need a set of EC2 service permissions so as to allow for the import of the VM as an EC2 AMI. Permissions are stored as “policies” and in their native form are JSON documents (JavaScript Object Notation), a format that is widely used in web applications. There are various ways of doing this you can use the AWS CLI but I will show how to do it using the IAM console. Log into the AWS console and go to IAM
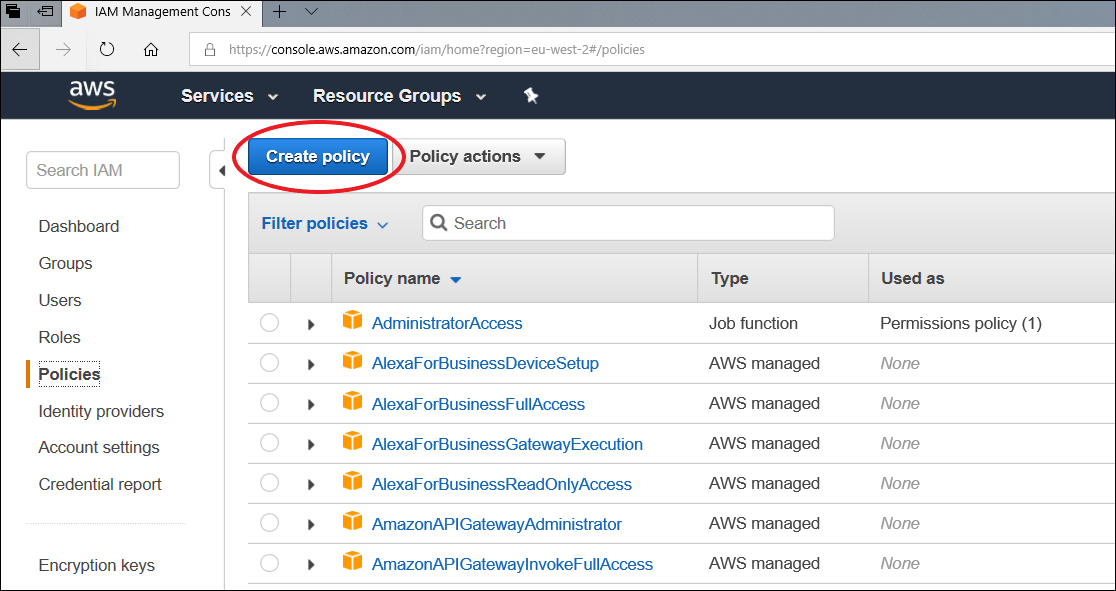
On the IAM console select Policies and “Create Policy”
On the next screen select the “JSON” tab and an empty JSON file framework will be displayed, you should delete this.
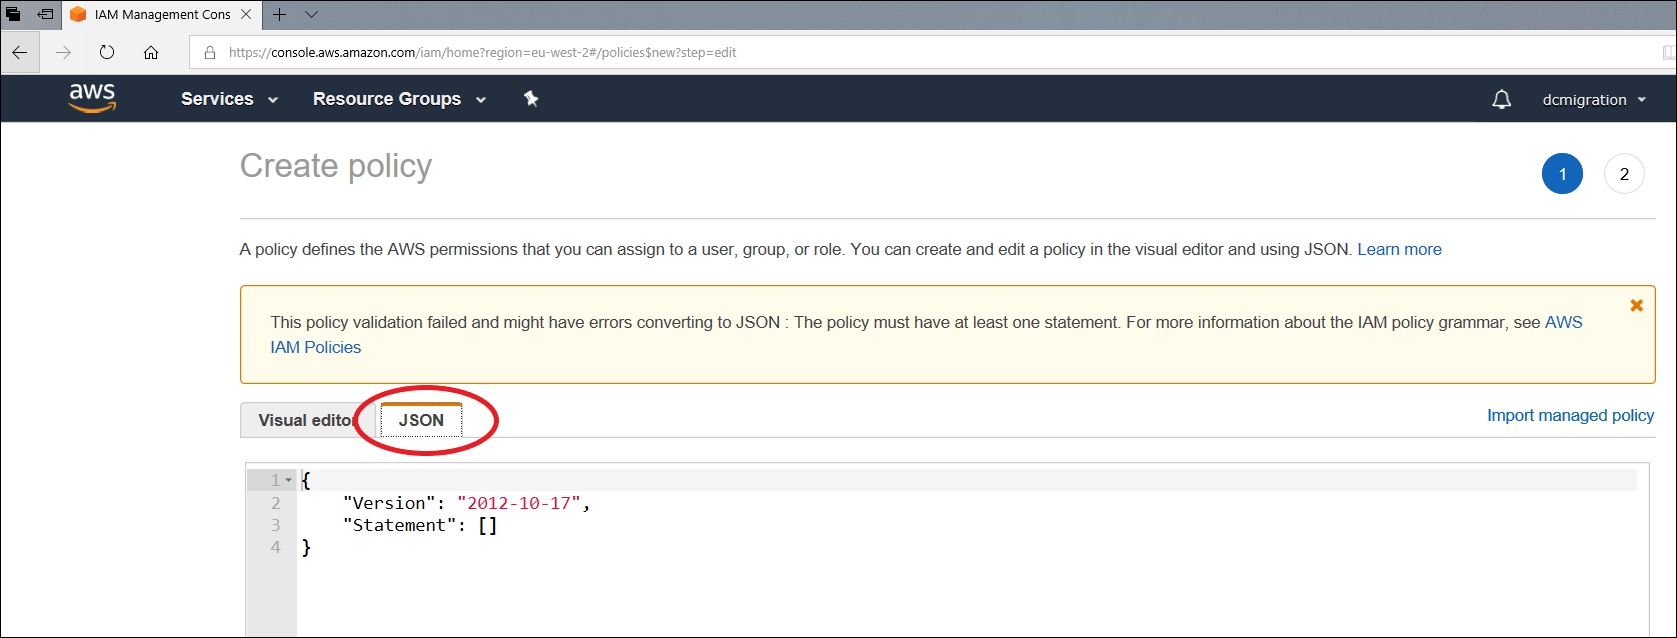
Then cut the Policy JSON text below and paste it into the AWS console window. Note: You will need to change the 2 references to “servermigrationtest” with the name of the S3 migration bucket you have created. The “Copy Code” button will copy the JSON code to your clipboard (right now there is a bug in the WordPress plug-in that puts a blank line at the start of the JSON code. You should delete this or IAM will give you an error message when you try to save the policy)
{
  "Version": "2012-10-17",
  "Statement": [
    {
      "Effect": "Allow",
      "Action": [
        "s3:ListAllMyBuckets"
      ],
      "Resource": "*"
    },
    {
      "Effect": "Allow",
      "Action": [
        "s3:CreateBucket",
        "s3:DeleteBucket",
        "s3:DeleteObject",
        "s3:GetBucketLocation",
        "s3:GetObject",
        "s3:ListBucket",
        "s3:PutObject"
      ],
      "Resource": ["arn:aws:s3:::servermigrationtest","arn:aws:s3:::servermigrationtest/*"]
    },
    {
      "Effect": "Allow",
      "Action": [
        "iam:CreateRole",
        "iam:PutRolePolicy"
      ],
      "Resource": "*"
    },
    {
      "Effect": "Allow",
      "Action": [
        "ec2:CancelConversionTask",
        "ec2:CancelExportTask",
        "ec2:CreateImage",
        "ec2:CreateInstanceExportTask",
        "ec2:CreateTags",
        "ec2:DeleteTags",
        "ec2:DescribeConversionTasks",
        "ec2:DescribeExportTasks",
        "ec2:DescribeExportImageTasks",
        "ec2:DescribeInstanceAttribute",
        "ec2:DescribeInstanceStatus",
        "ec2:DescribeInstances",
        "ec2:DescribeTags",
        "ec2:ExportImage",
        "ec2:ImportInstance",
        "ec2:ImportVolume",
        "ec2:StartInstances",
        "ec2:StopInstances",
        "ec2:TerminateInstances",
        "ec2:ImportImage",
        "ec2:ImportSnapshot",
        "ec2:DescribeImportImageTasks",
        "ec2:DescribeImportSnapshotTasks",
        "ec2:CancelImportTask"
      ],
      "Resource": "*"
    }
  ]
}
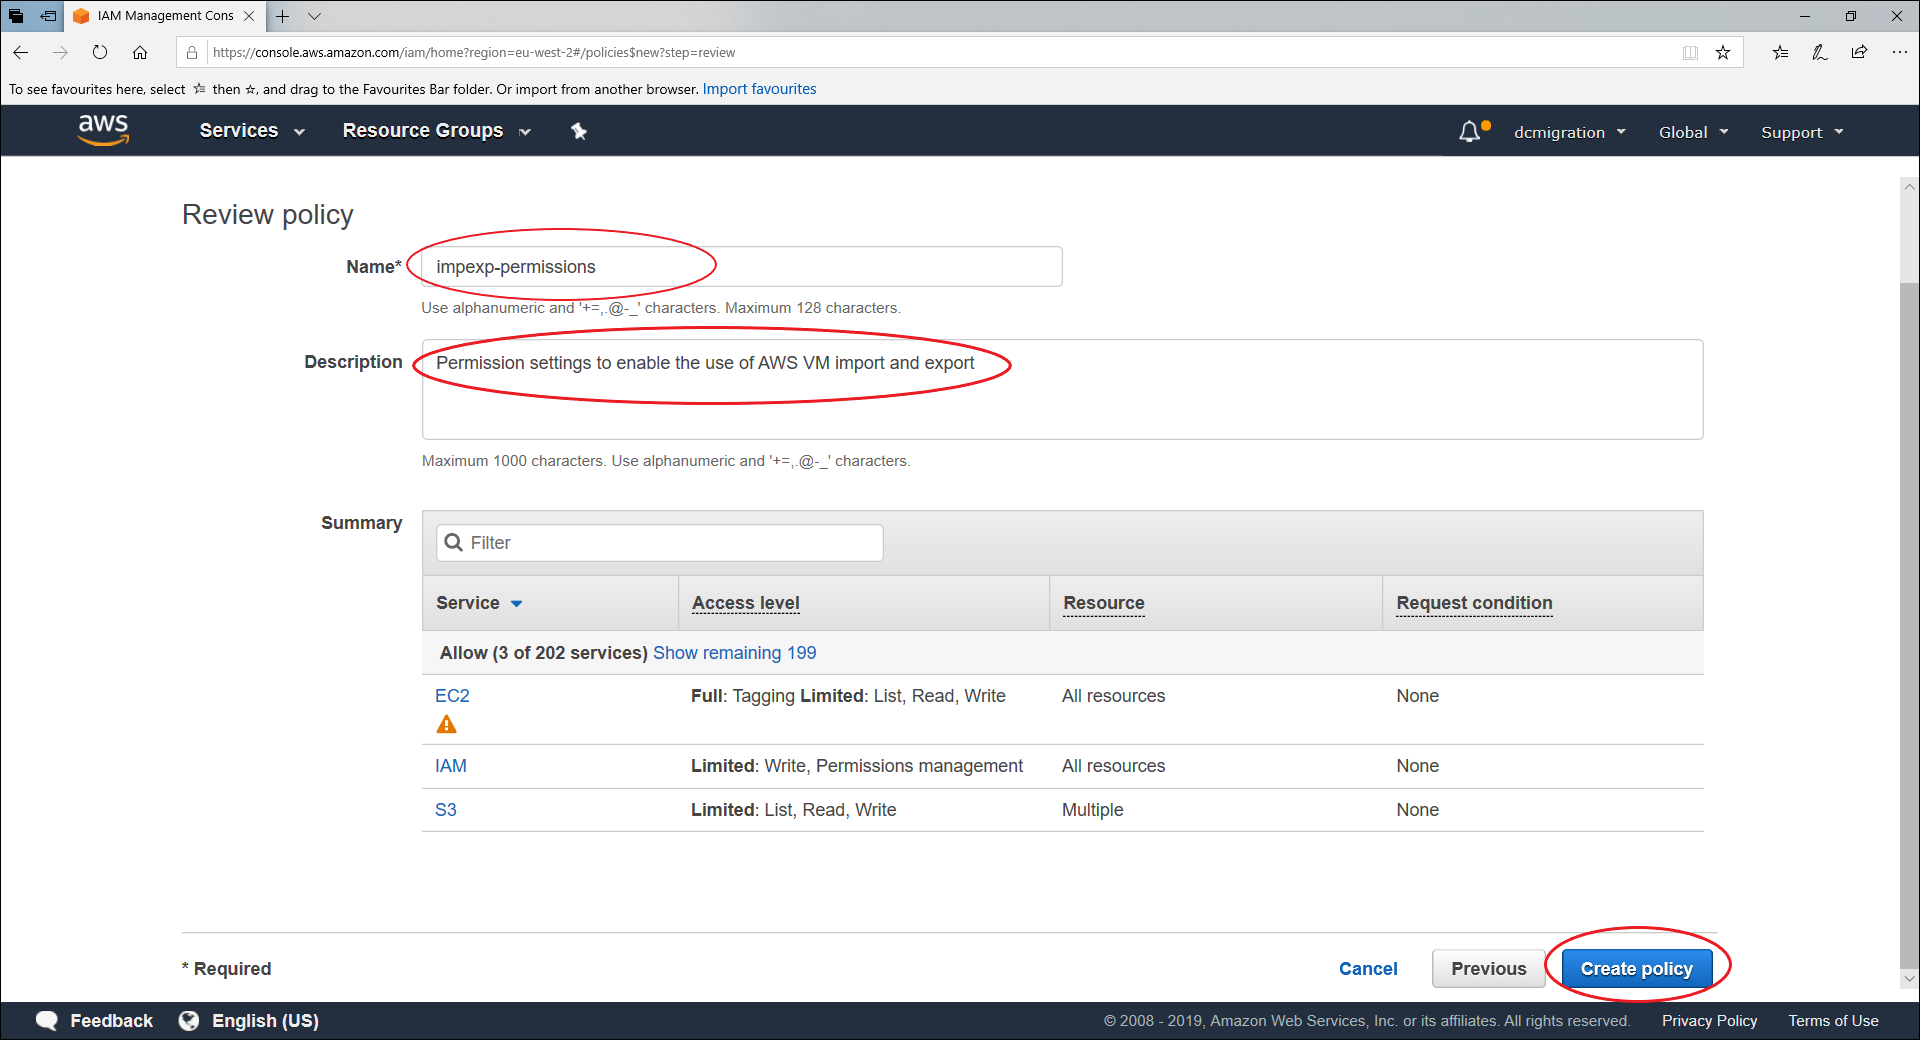
Once you have pasted the permission definition above and changed the bucket names to match the bucket you are going to use for the import you can give the policy a name and save it as shown below. Note that a warning symbol is displayed next to EC2 section in the Summary . This is just because we are allowing pretty much all EC2 actions. You can ignore the warning
Once you have created the policy you can assign it the migration user. It is best practice to assign the policy to a group and then make users members of that group but for the purposes of this article I will do it the quick and dirty way.
Create the “vmimport”role
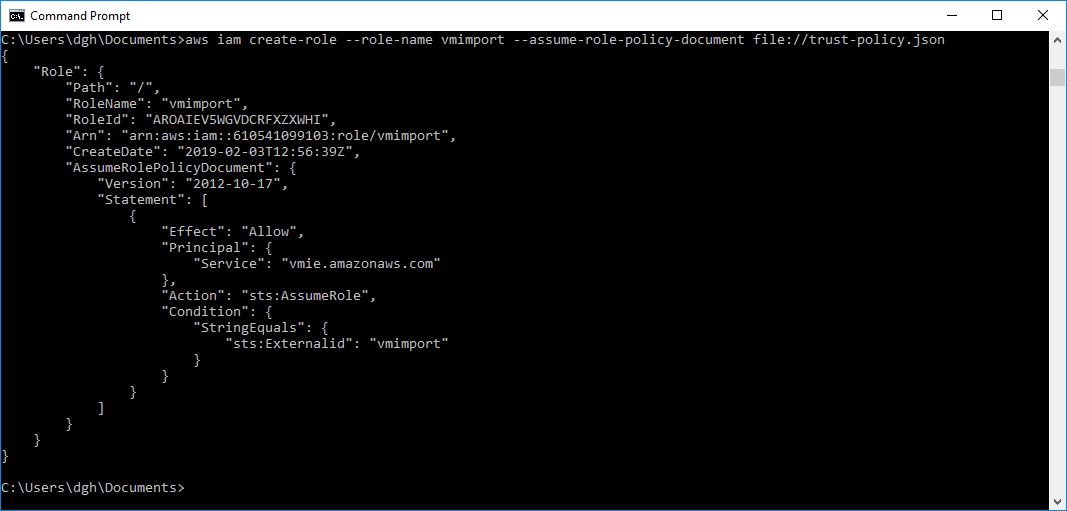
The next step is to create an explicitly named role “vmimport” that will allow the AWS “VM import/export” service to interact with your account and carry out the import tasks on your behalf. To do this we define a role in our AWS account and also specify that we “trust” the AWS “vmie” service to assume that role in our account. Note that the name of the role must be “vmimport” as that is what the import/export service will look for. Annoyingly you have to do this using the AWS CLI as creating a role for the VM Import/Export service is not on the AWS console IAM roles menu for some reason. The first step is to put the JSON definition below into a file on the system you are using to manage the migration (I am using a Windows 10 PC so I copy the JSON into notepad and save it locally)
{
   "Version": "2012-10-17",
   "Statement": [
      {
         "Effect": "Allow",
         "Principal": { "Service": "vmie.amazonaws.com" },
         "Action": "sts:AssumeRole",
         "Condition": {
            "StringEquals":{
               "sts:Externalid": "vmimport"
            }
         }
      }
   ]
}
Once you have the JSON text for the vmimport role in a file you can use the AWS CLI command shown below to create the role in your AWS account. If the CLI command is successful you should see output similar to that shown below.
Once the role has been created it is necessary to assign some permissions to it. To do this, once again, we need to create a JSON file that contains the specifications of the permissions we are going to assign to the “vmimport” user. The required permissions are detailed in the code snippet block below. Cut and paste them into a file
{
   "Version":"2012-10-17",
   "Statement":[
      {
         "Effect":"Allow",
         "Action":[
            "s3:GetBucketLocation",
            "s3:GetObject",
            "s3:ListBucket"
         ],
         "Resource":[
            "arn:aws:s3:::servermigrationtest",
            "arn:aws:s3:::servermigrationtest/*"
         ]
      },
      {
         "Effect":"Allow",
         "Action":[
            "ec2:ModifySnapshotAttribute",
            "ec2:CopySnapshot",
            "ec2:RegisterImage",
            "ec2:Describe*"
         ],
         "Resource":"*"
      }
   ]
}
Once you have the JSON permission definitions in a file (I called mine role-policy.json) you can issue the AWS CLI command shown below to attach the permissions to the “vmimport” role.

Conclusion
That about wraps up the AWS pre-migration set-up steps. The next thing we will look at is importing an ESX VM in Part-2 and importing a Hyper-V VM in Part-3