
Introduction
This post deals with installing and setting up the SMS connector VM appliance in a VMware environment. In part-1 of this post we looked at the initial AWS configuration from the console.
Download and Install the SMS Connector VM
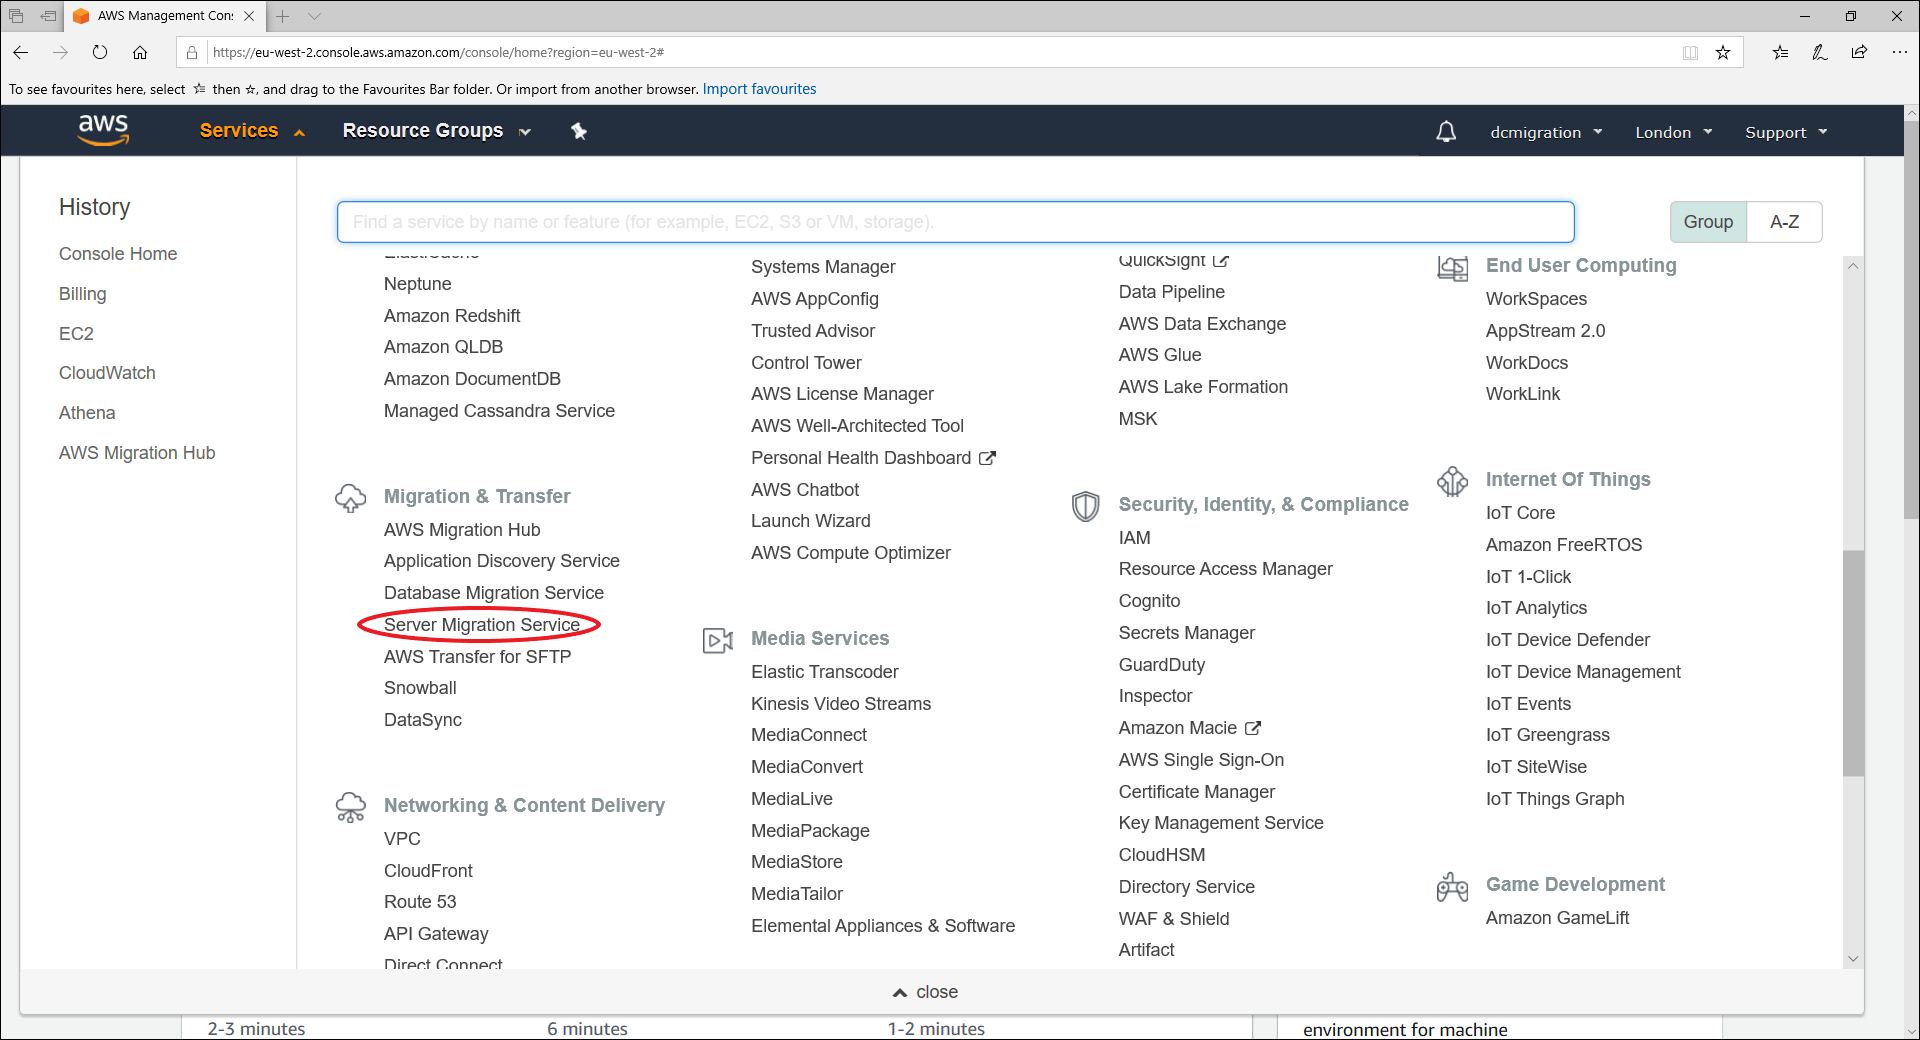
As previously mentioned SMS needs a “Connector” VM appliance that you run in your vCentre environment. This is downloaded as an OVA as shown below. First go to the AWS console and from the main Services page select the Server Migration Service.
On the SMS front page click “Get Started”

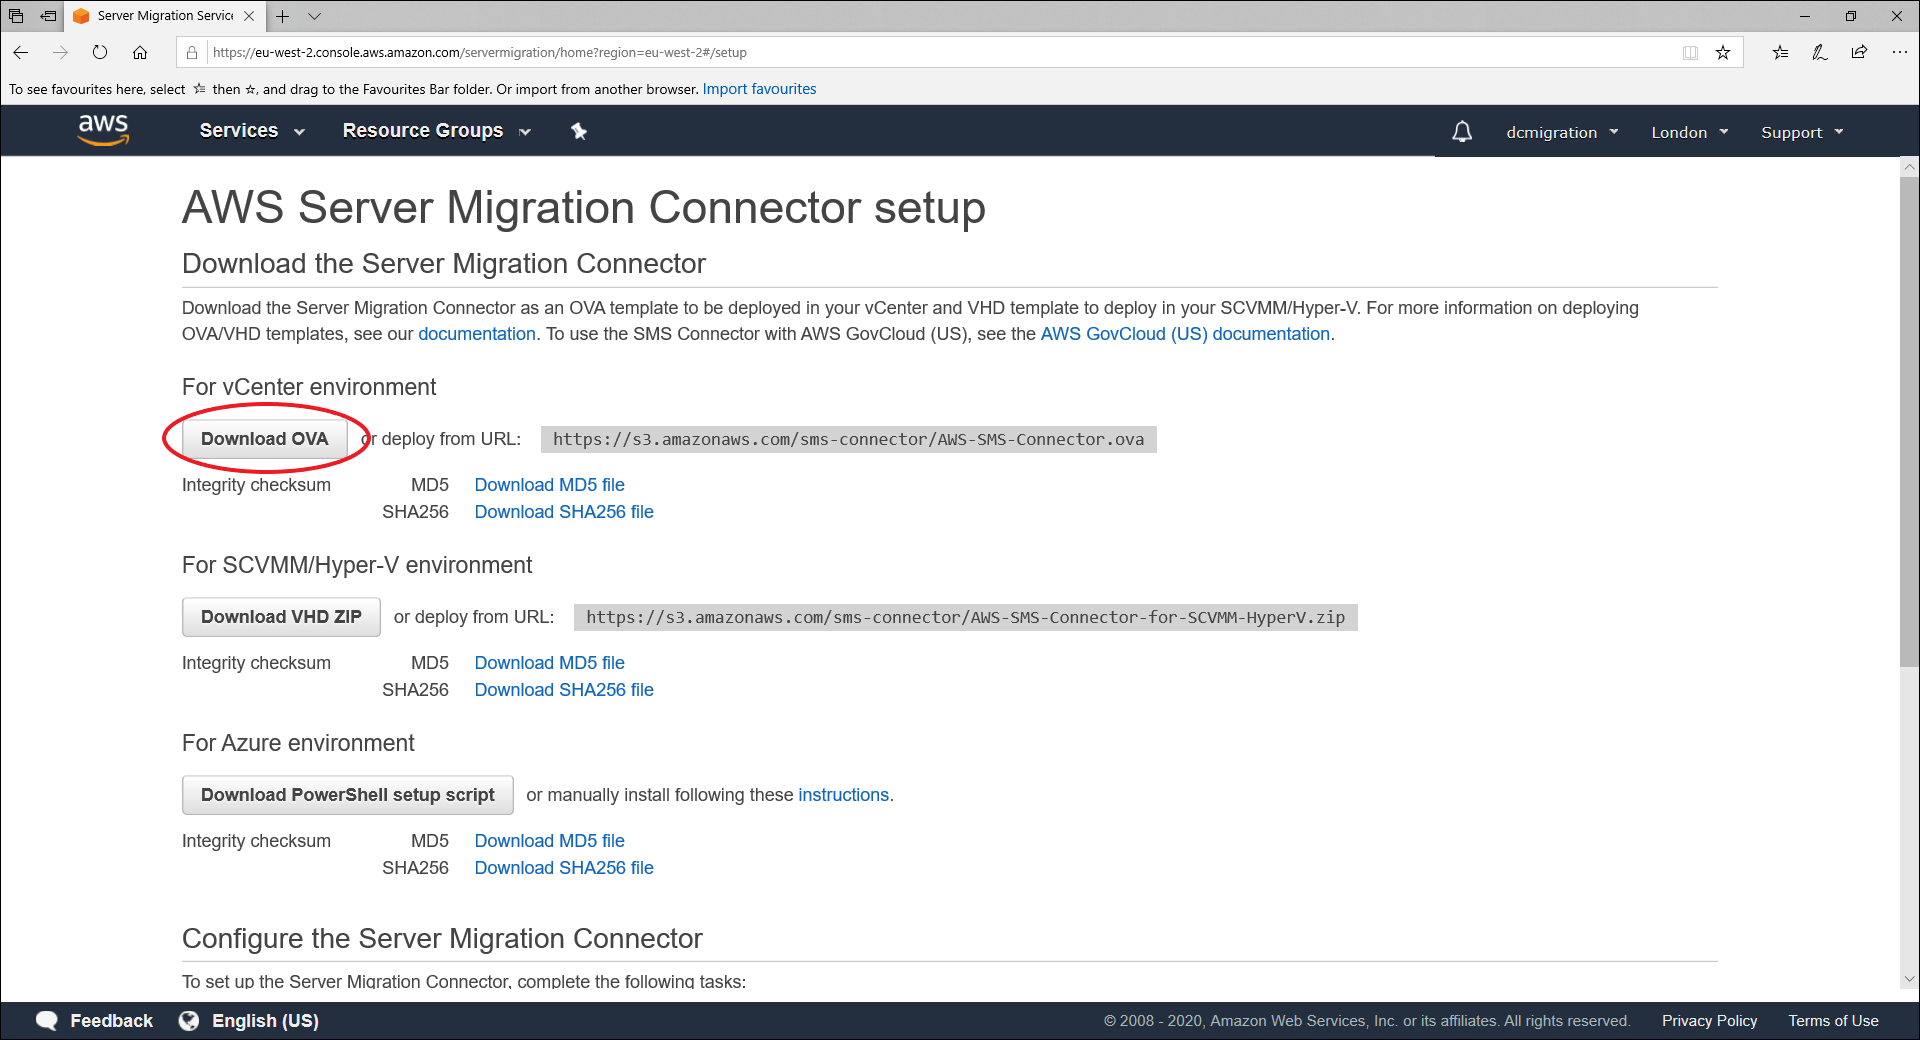
Currently 3 versions of the SMS connector are available, one for VMware, one for Hyper-V and finally one for Azure. We want to download the VMware OVA.
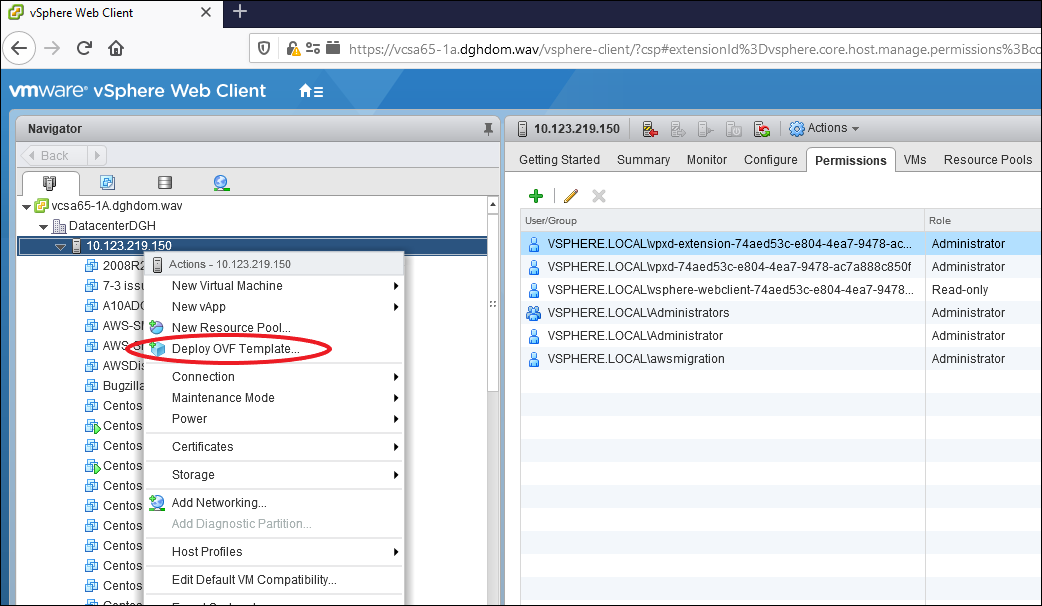
The next step is to deploy the OVA in your vCentre environment. Pick an ESX server and select Deploy OVF template.
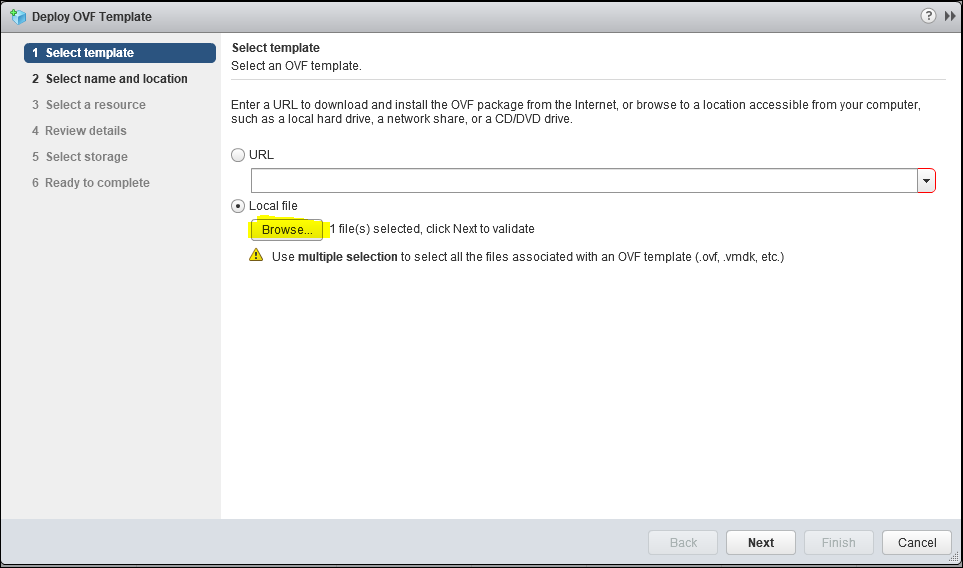
Browse for the OVA file you have downloaded
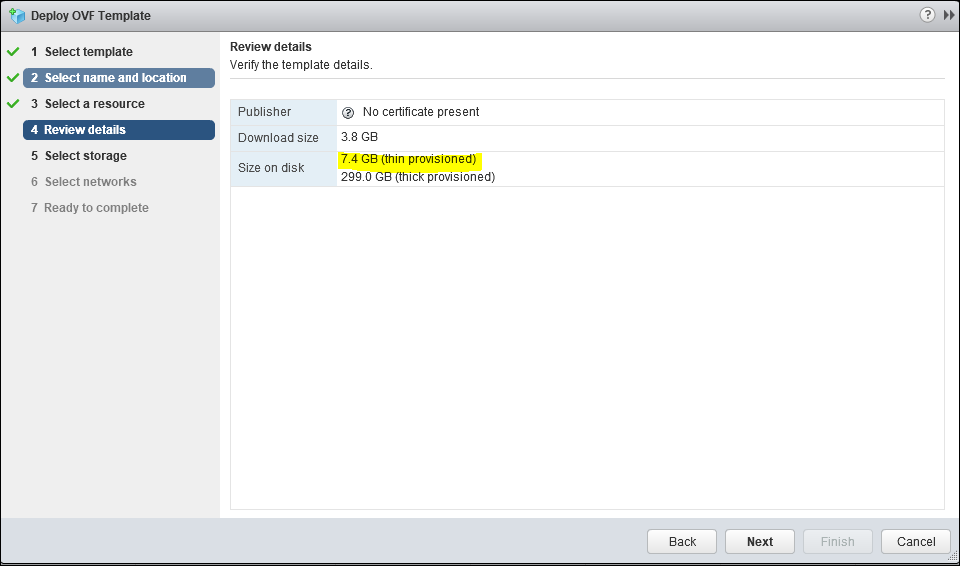
You need to select a name and a Datastore location for the VM. AWS recommend that you use thick provisioned storage but I did not want to allocate 300GB in our lab environment so I went with thin provisioning which comes out at around 7.5GB initially.
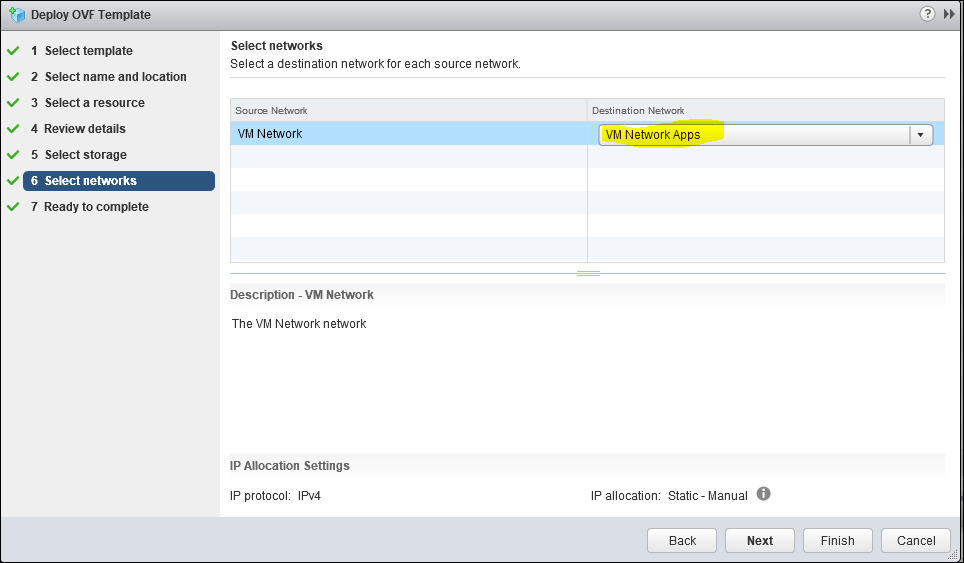
In the unlikley event that you have not deployed an OVA before there is one more thing worth mentioning. That is the network that the appliance will be connected to. All the VMware appliances that I have seen are connected to a network called “VM Network”. If you want your appliance connected to something different then you need to change it on the “Select Networks” screen as shown below.
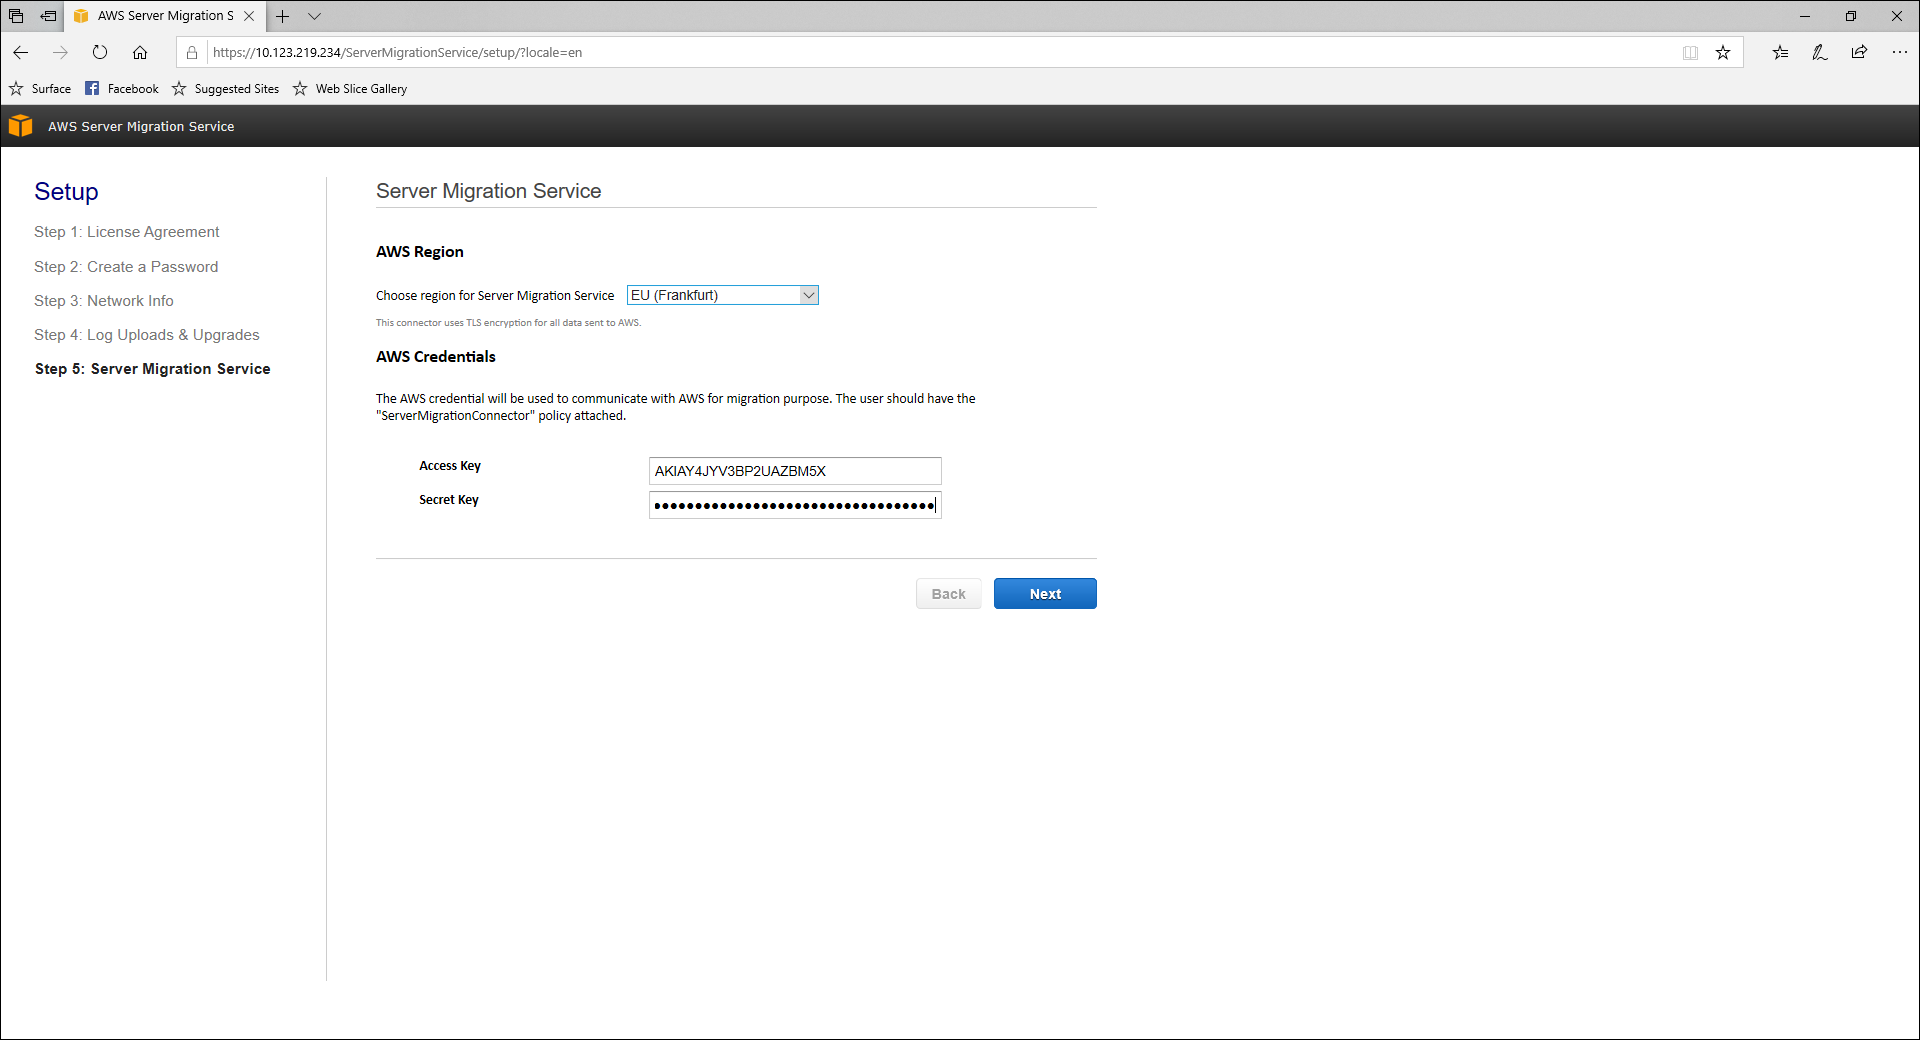
Configure the Connector to talk to AWS
Configuring local network settings
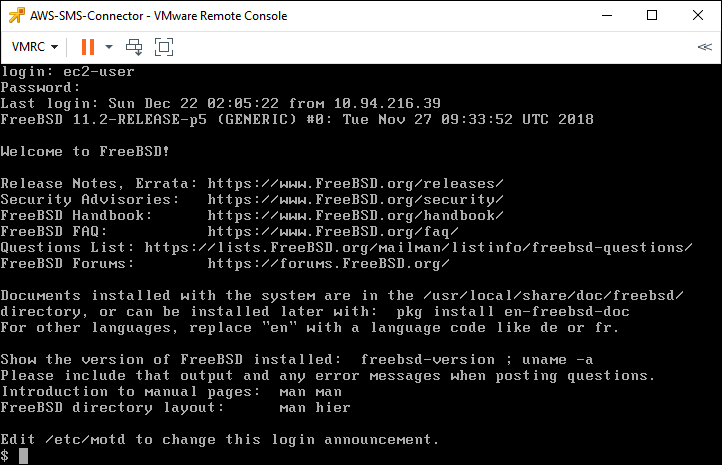
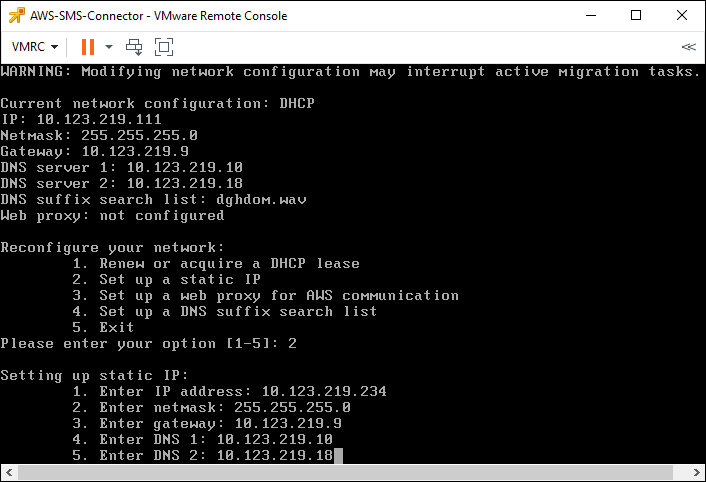
Once you have finished installing the Connector VM you boot it, obviously !. You will almost certainly want your SMS connector appliance to have a static IP address. Out of the box it uses DHCP. I think the simplest way to achieve this is to create a DHCP reservation on your DHCP server (in my lab I use Active Directory) . If you don’t want to (or can’t) go the DHCP reservation route configuring the connector is a bit clunky. If you want to give the Connector a static IP address you need to log on to the appliance via its VM console and run a CLI based configuration script there as shown below. First log in via the VM’s console (either ESX or vSphere). The user name is “ec2-user” and password is “ec2pass”. Note that out of the box you can’t ssh into the appliance (but see my article on fixing that here )
Once you are logged in you need to run a Ruby script setup.rb via “sudo” (the sudo command allows non-privileged users to perform certain privileged tasks). Sudo will prompt for a password , enter “ec2pass”.

Next we select menu option 2 to reconfigure the network settings. The we select menu choice 2 again.
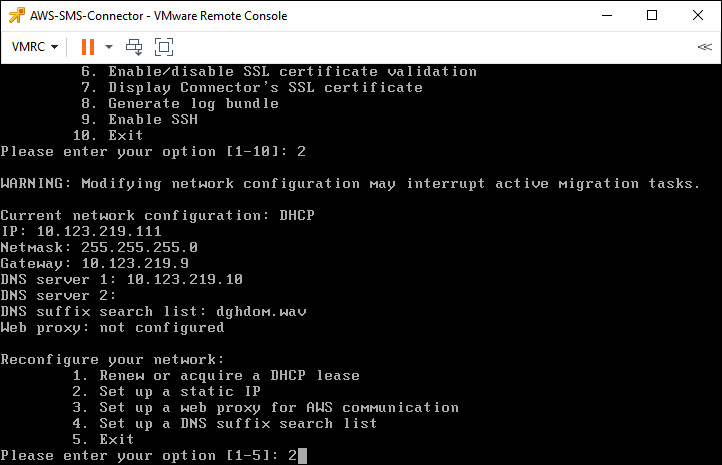
Fill in the values as prompted. It seems the script is a bit clunky and you don’t seem to be able to skip the 2nd DNS server.
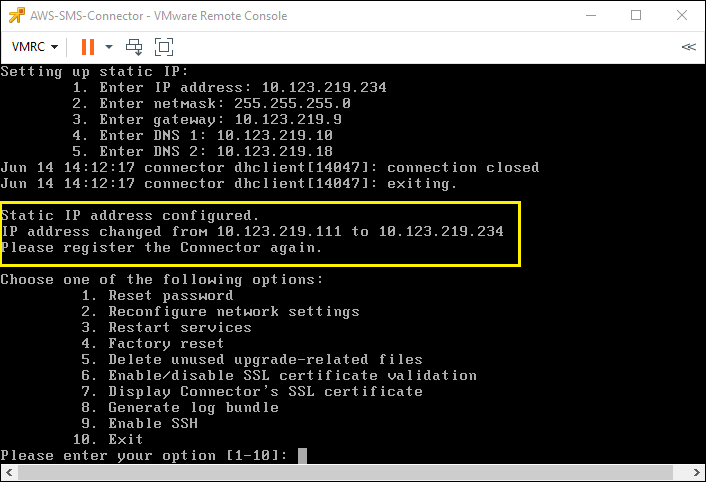
Finally the network will restart with the settings you have entered. Note that you are asked to register the connector again (yellow box). In fact if you do the configuration in the order I have used in this article you will not need to re-register the connector as it has not been registered at this point.
Creating a vSphere user and role
The next task is to create a user and a role which assigns the required permissions to allow SMS to work. You could, of course, just use the administrator user id but that is not security best practice.
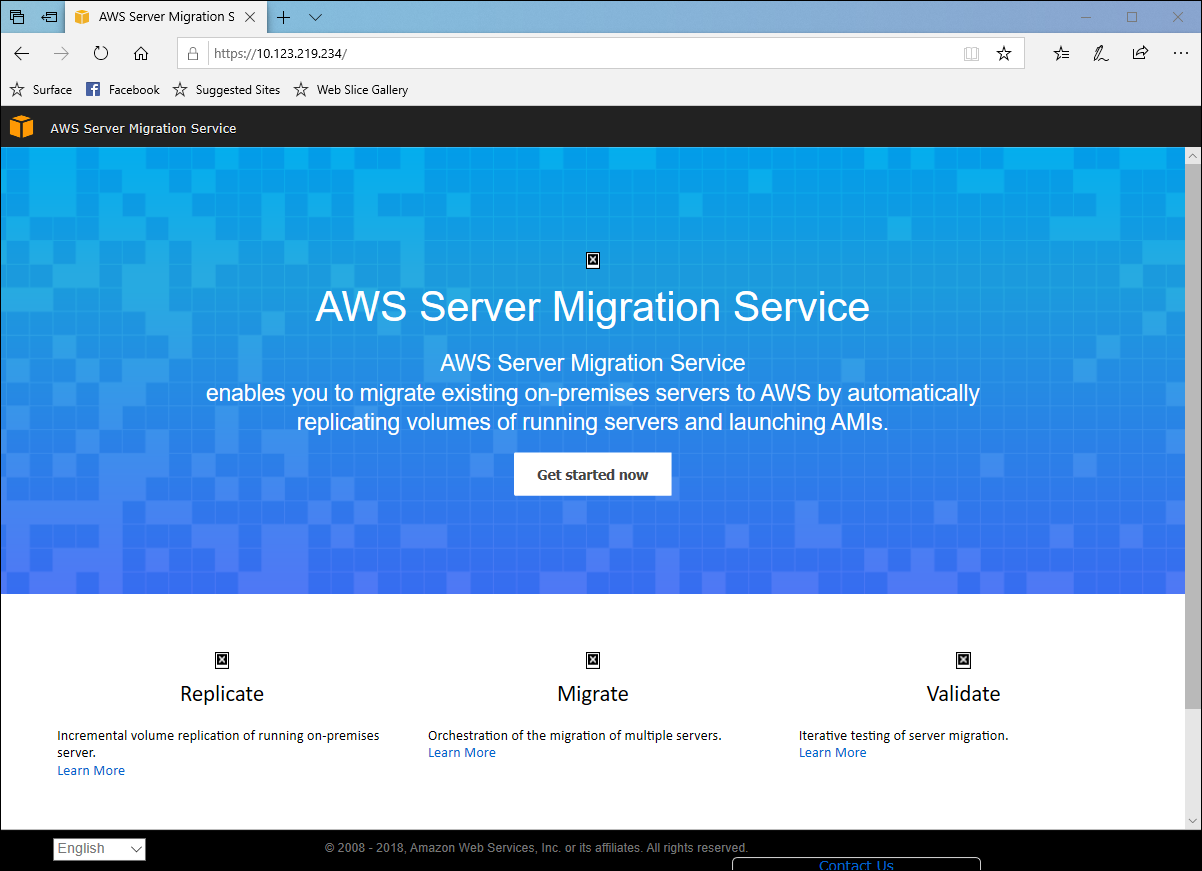
Configuring the connector via its web interface
Connect to the SMS connector using a web browser. In the example here I have already registered the CA root certificate in Windows’ certificate store so I don’t get a certificate error.
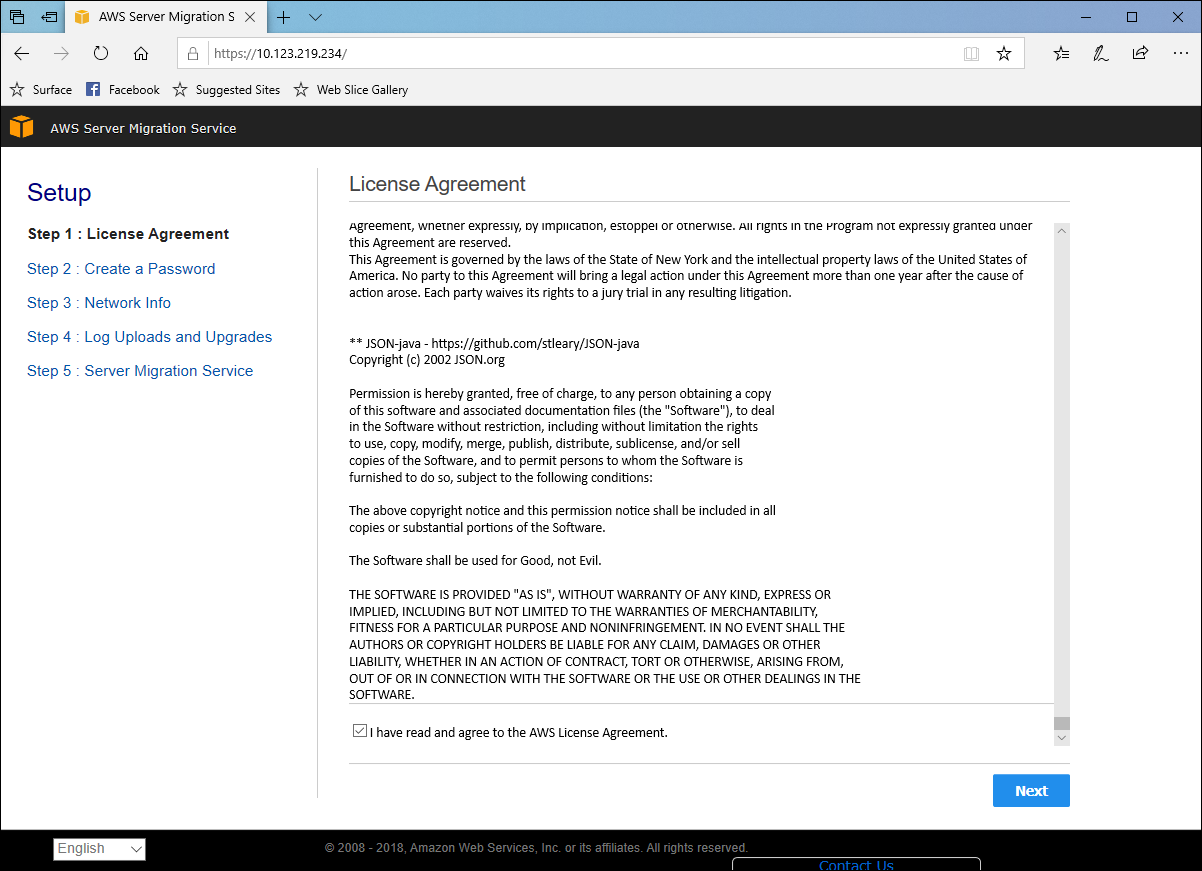
Next you need to accept the licence agreement (it is very long) Scrolling down to the bottom will display a tick box. You can then click [Next]
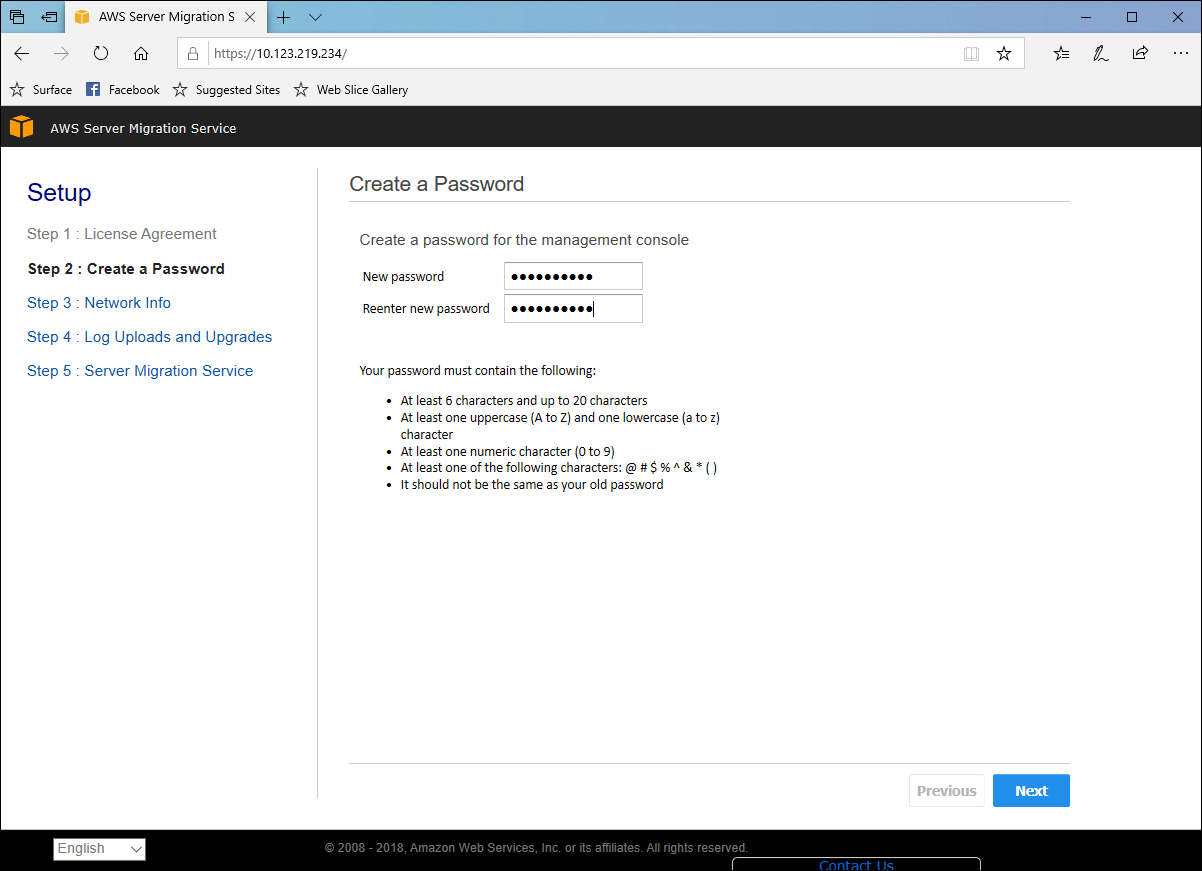
The next screen asks you to set-up a password for future access to the SMS web console (there is no user name).
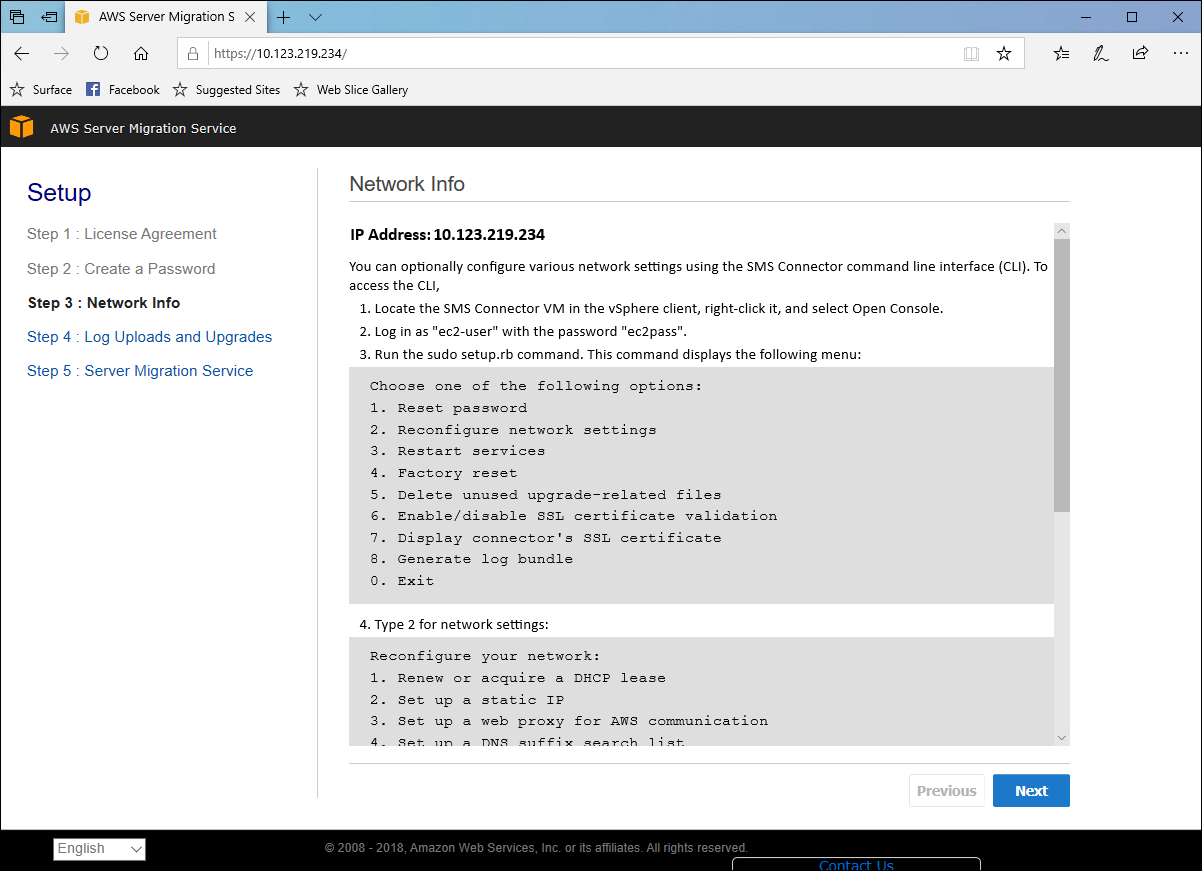
The next screen shows the network information but we can skip that because we have already fixed it at the OS console level. Note you can’t alter any of the network configuration via this web interface (it just tells you how to do it via the CLI console)
Then
Perform a Migration